SELECT m.*, META(m).id
FROM boothduty m
WHERE m.type = 'mongodbcomparison'
ORDER BY UUID()
LIMIT 1;Posts tagged with 'azure'
Stephen Cleary is writing Azure Functions. This episode is sponsored by Smartsheet.
Show Notes:
-
The Stack Overflow answer that prompted this podcast
-
Be sure to check out
LazyThreadSafetyModein the documentation (Stephen recommendedPublicationOnlymode) -
Stephen’s AsyncEx project
-
Jon Skeet’s EduAsync series
-
Microsoft docs on Azure Functions
-
Spend some time with your family!
Want to be on the next episode? You can! All you need is the willingness to talk about something technical.
Music is by Joe Ferg, check out more music on JoeFerg.com!
How are you liking Season 3 so far? I'm having a blast!
Some reminders:
The new original music is by JoeFerg. Check out his stuff!
Have you checked out my sponsor yet? Smartsheet!
If you're enjoying the new JavaScript game show, please start sending in your suggestions. I'm running out of ideas, and you and your ideas could be featured on this show. I need real and made-up suggestions!
Subscribe now!
Here's what's coming in February:
- Stephen Clearly on Azure Functions
- Scott Drake on hiring programmers
- Jeffrey Miller on Neo4j
- Andrea Cremes on SaaS
Subscribe now with your podcatcher of choice!
Want to be on the next episode? You can! All you need is the willingness to talk about something technical.
This is a repost that originally appeared on the Couchbase Blog: Alexa Skills with Azure Functions and Couchbase.
Alexa Skills are the "apps" that you can build to run on Amazon devices like the Echo, Echo Dot, etc. In this blog post, you’ll learn how to build an Alexa skill using serverless Azure Functions and a Couchbase backend running on Azure. This post builds on a lot of blog posts I’ve written about Azure Functions, Serverless, and Couchbase on Azure in the past:
-
Serverless Architecture with Cloud Computing - What is serverless?
-
Azure Functions and Lazy Initialization with Couchbase Server - Recommendations when using Couchbase and Azure Functions together
-
Chatbot on Azure and Couchbase for Viber - A use case similar to an Alexa skill
-
Azure: Getting Started is Easy and Free - How to use the Azure Marketplace to easily create a Couchbase Cluster
What kind of Alexa skills am I building?
I work as a Developer Advocate, which means I often spend time at sponsor booths at developer events. I love doing this: I get to tell people how great Couchbase is, and I often get feedback from developers about what problems they’re trying to solve with Couchbase.
If there’s one thing I don’t like about working a booth, though, it’s repetition. I often get asked the same set of questions hundreds of times per events:
-
What is Couchbase? (distributed NoSQL document database with a memory first architecture)
-
How is Couchbase different than MongoDB? (they are both document databases, but Couchbase has major feature and architectural differences)
-
Is Couchbase the same thing as CouchDB? (No.)
I’m not complaining, mind you. It’s just that it’s hard to be enthusiastic when answering the question for the 100th time as the conference is about to close down.
But you know who is always enthusiastic? Alexa! So, if I bring my Echo Dot to the next event, maybe she can help me:
-
What is Couchbase? - Alexa will say a random interesting fact about Couchbase
-
How is Couchbase different than MongoDB? Alexa will say a random architectural or feature difference.
-
Is Couchbase the same thing as CouchDB? Alexa will say "no".
If these Alexa skills turn out to be helpful, I can expand the skills later to answer more complex questions.
If you want to follow along with this post and create your own Alexa skills, the full source code is available on Github.
Design
Alexa skills are registered with Amazon. For the most part, they make simple HTTP requests to the endpoint that you designate and expect a certain JSON response. Azure Functions can process HTTP requests. The Azure Functions can make queries out to a database full of responses, and can also keep track of how many times each response has been given.
Below is a high-level architectural diagram of my minimum viable Alexa skills project:

Data storage and design
The skill is going to ultimately query some data from Couchbase Server. I’ll start with 2 different kinds of documents. (If these Alexa skills turn out to be useful, I’ll add more complex stuff later).
Document design
Each document represents a possible response. Each will have 3 fields:
-
type- This will be either "mongodbcomparison" or "whatiscouchbase". -
number- The number of times this response has been used (starting at 0). -
text- The text that I want the Alexa skills to say.
The document key design of these documents is not important (at least not yet), since I’ll be using only N1QL (SQL for JSON) queries to retrieve them. However, I’ve decided to create keys like "mongo::2" and "couchbase::5".
To start, I will store this data in a single Couchbase node on a low cost Azure VM. A single node with a small amount of data should be able to handle even heavy booth traffic no problem. But if, for instance, I were to install these as kiosks in airports around the world I will definitely need to scale up my Couchbase cluster. Couchbase and Azure makes this easy.
Query design
To get a random document, I need to run a N1QL query:
UUID is functioning as a random number generator. That’s not really what it’s for, but it’s "good enough". If I really needed true randomness, I could make a curl request in N1QL to random.org’s API.
To run that query, I need to create an index for the 'type' field:
CREATE INDEX ix_type ON boothduty(type);Azure Functions
To create an Azure Function, I used an existing .NET library called AlexaSkills.NET, which makes it very easy to write the code you need to create Alexa skills.
After creating my Azure Functions solution, I added it with NuGet.
Using AlexaSkills.NET
Next, I created a "speechlet" class. I chose to make my speechlet asynchronous, but a synchronous option exists as well. There are four methods that need to be created. I only really need two of them for the skill at this point.
    public class BoothDutySpeechlet : SpeechletBase, ISpeechletWithContextAsync
    {
        public async Task<SpeechletResponse> OnIntentAsync(IntentRequest intentRequest, Session session, Context context)
        {
            try
            {
                var intentName = intentRequest.Intent.Name;
                var intentProcessor = IntentProcessor.Create(intentName);
                return await intentProcessor.Execute(intentRequest);
            }
            catch (Exception ex)
            {
                var resp = new SpeechletResponse();
                resp.ShouldEndSession = false;
                resp.OutputSpeech = new PlainTextOutputSpeech() { Text = ex.Message };
                return await Task.FromResult(resp);
            }
        }

        public Task<SpeechletResponse> OnLaunchAsync(LaunchRequest launchRequest, Session session, Context context)
        {
            var resp = new SpeechletResponse();
            resp.ShouldEndSession = false;
            resp.OutputSpeech = new PlainTextOutputSpeech() { Text = "Welcome to the Couchbase booth. Ask me about Couchbase." };
            return Task.FromResult(resp);
        }

        public Task OnSessionStartedAsync(SessionStartedRequest sessionStartedRequest, Session session, Context context)
        {
            return Task.Delay(0); // nothing to do (yet)
        }

        public Task OnSessionEndedAsync(SessionEndedRequest sessionEndedRequest, Session session, Context context)
        {
            return Task.Delay(0); // nothing to do (yet)
        }

        // I only need to use this when I'm testing locally
//        public override bool OnRequestValidation(SpeechletRequestValidationResult result, DateTime referenceTimeUtc,
//            SpeechletRequestEnvelope requestEnvelope)
//        {
//            return true;
//        }
    }
The OnLaunchAsync is the first thing that an Echo user will reach. The user will say something like "Alexa, open Matt’s booth helper", and this code will respond with some basic instructions.
The OnIntentAsync is where most of the Alexa skills request will be processed. I’m using a factory/strategy code pattern here to instantiate a different object depending on which intent is being invoked (more on "intents" later).
public static IIntentProcessor Create(string intentName = "FallbackIntent")
{
    switch (intentName)
    {
        case "MongodbComparisonIntent":
            return new MongoDbComparisonIntentProcessor(CouchbaseBucket.GetBucket());
        case "WhatIsCouchbaseIntent":
            return new WhatIsCouchbaseIntentProcessor(CouchbaseBucket.GetBucket());
        case "CouchDbIntent":
            return new CouchDbIntentProcessor();
        case "FallbackIntent":
            return new FallbackIntentProcessor();
        default:
            return new FallbackIntentProcessor();
    }
}
Connecting to Couchbase
CouchbaseBucket.GetBucket() is using Lazy behind the scenes as outlined in my earlier blog post on Azure Functions.
So, whenever a 'What is Couchbase' intent comes in, a WhatIsCouchbaseIntentProcessor is instantiated and executed.
public class WhatIsCouchbaseIntentProcessor : BaseIntentProcessor
{
    private readonly IBucket _bucket;

    public WhatIsCouchbaseIntentProcessor(IBucket bucket)
    {
        _bucket = bucket;
    }

    public override async Task<SpeechletResponse> Execute(IntentRequest intentRequest)
    {
        // get random fact from bucket
        var n1ql = @"select m.*, meta(m).id
                        from boothduty m
                        where m.type = 'whatiscouchbase'
                        order by `number`, uuid()
                        limit 1;";
        var query = QueryRequest.Create(n1ql);
        var result = await _bucket.QueryAsync<BoothFact>(query);
        if (result == null || !result.Rows.Any())
            return await CreateErrorResponseAsync();
        var fact = result.First();

        // increment fact count
        await _bucket.MutateIn<dynamic>(fact.Id)
            .Counter("number", 1)
            .ExecuteAsync();

        // return text of fact
        return await CreatePlainTextSpeechletReponseAsync(fact.Text);
    }
}
Note the use of the N1QL query that was mentioned earlier (slightly tweaked so that facts with lower numbers will be given priority). This code is also using the Couchbase subdocument API to increment the "number" field by 1.
You can view the full code of the other intent processors on Github, but they are very similar (just with slightly different N1QL).
Connecting to Azure Functions
Finally, once my speechlet is ready, it’s easy to wire up to an Azure Function.
public static class BoothDuty
{
    [FunctionName("BoothDuty")]
    public static async Task<HttpResponseMessage> Run([HttpTrigger(AuthorizationLevel.Anonymous, "get", "post", Route = null)]HttpRequestMessage req, TraceWriter log)
    {
        var speechlet = new BoothDutySpeechlet();
        return await speechlet.GetResponseAsync(req);
    }
}
You can now test this locally with Postman, or with the Alexa interface once you deploy to azure.
Creating the Alexa skills
I won’t go through the whole process, since there’s plenty of documentation on how to setup Alexa skills. I think I have more work to do before my skill is officially certified, but it’s good enough for beta testing.
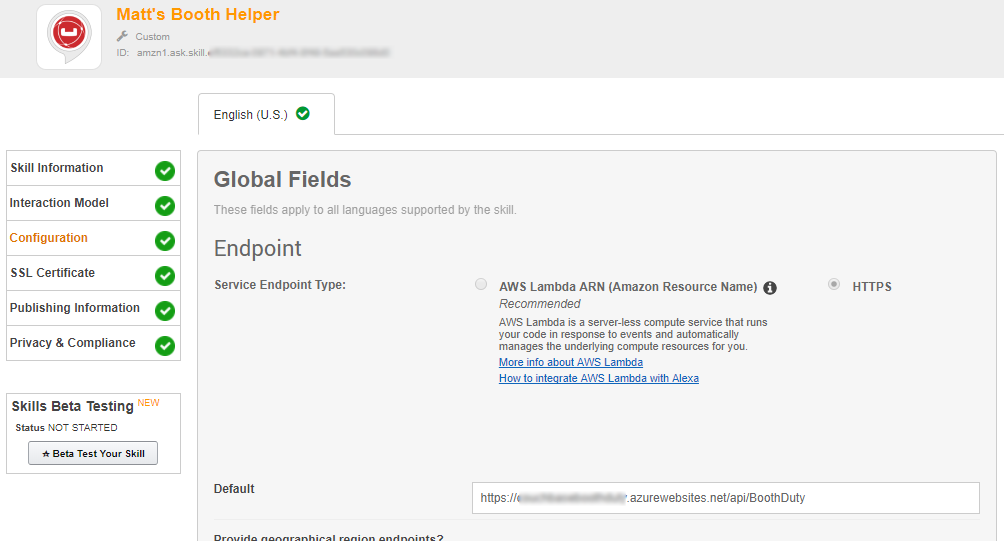
Once you have the Azure Functions URL, you’ll use that with Alexa. Alexa requires skills to use HTTPS, but fortunately Azure Functions come with HTTPS on a azurewebsites.net subdomain. Here’s a screenshot:
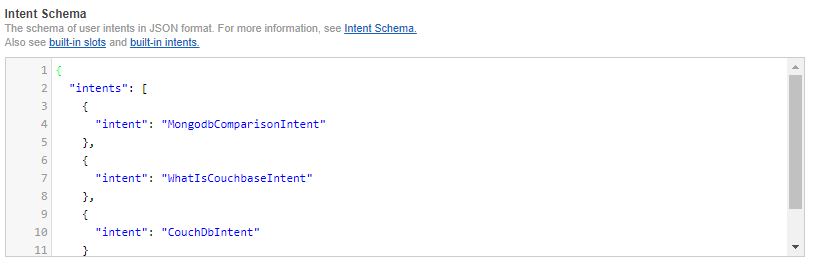
I mentioned "intents" earlier. These are various types of actions that Alexa skills can process, along with their inputs. Think of these like function signatures. Currently, I have designed 3 intents, and I have no parameters on these (yet). So my intent schema is a very simple piece of JSON:
For each intent, you can create "utterances" that map to the intents. These are the phrases that an Echo user will speak, and which intent they correspond to.
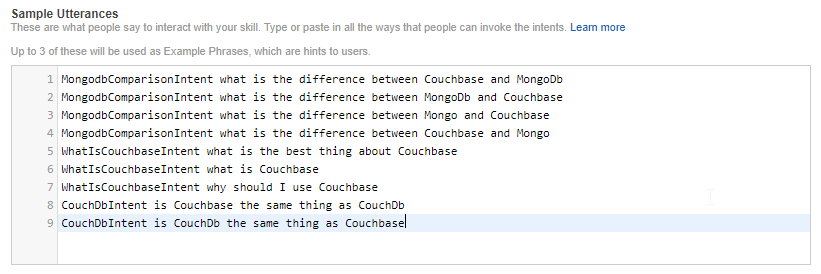
I’ve tried to think of all the different variations. But if I really wanted this to work more generally, I would setup parameters so that a user could ask the question "What is the difference between Couchbase and {x}".
Echo Dot in action
I did not publish this on the Alexa store. I did deploy it as a "beta test", so if you want to try it out, I’d be happy to send you an invitation to get it.
Here’s a video of my trying it out on my Echo Dot (which was a speaker gift last year from the fine people at DevNexus):
Will this actually work at a noisy booth? Well, let’s just say I’m not ready to bring an easy chair and pillow to the booth just yet. But it’s a fun way to demonstrate the power of Couchbase as an engagement database.
Summary
Alexa skills are a great place to use serverless architecture like Azure Functions. The skills will be used intermittently, and Azure Functions will only bill you for the time they are executed.
Couchbase Server again makes a great database for such an app. It can start out small to handle a single booth, but it can scale easily to accommodate larger demand.
Have a question about Couchbase? Visit the Couchbase forums.
Have a question for me? Find me on Twitter @mgroves.
Be sure to check out all the great documentation from Microsoft on Azure Functions, and the documentation on the Alexa Skills .NET library.
This is a repost that originally appeared on the Couchbase Blog: Test Drive: Trying Couchbase on Azure for Free.
Test Drive is an Azure feature that allows you to try out software in the cloud for free.
Previously, I wrote about how Getting started with Couchbase on Azure is easy and free. That post told you how to get started with $200 in Azure credit. With Test Drive, however, it’s even easier to get started, and you don’t have to use any of that $200 credit.
Test Drive on Azure Marketplace
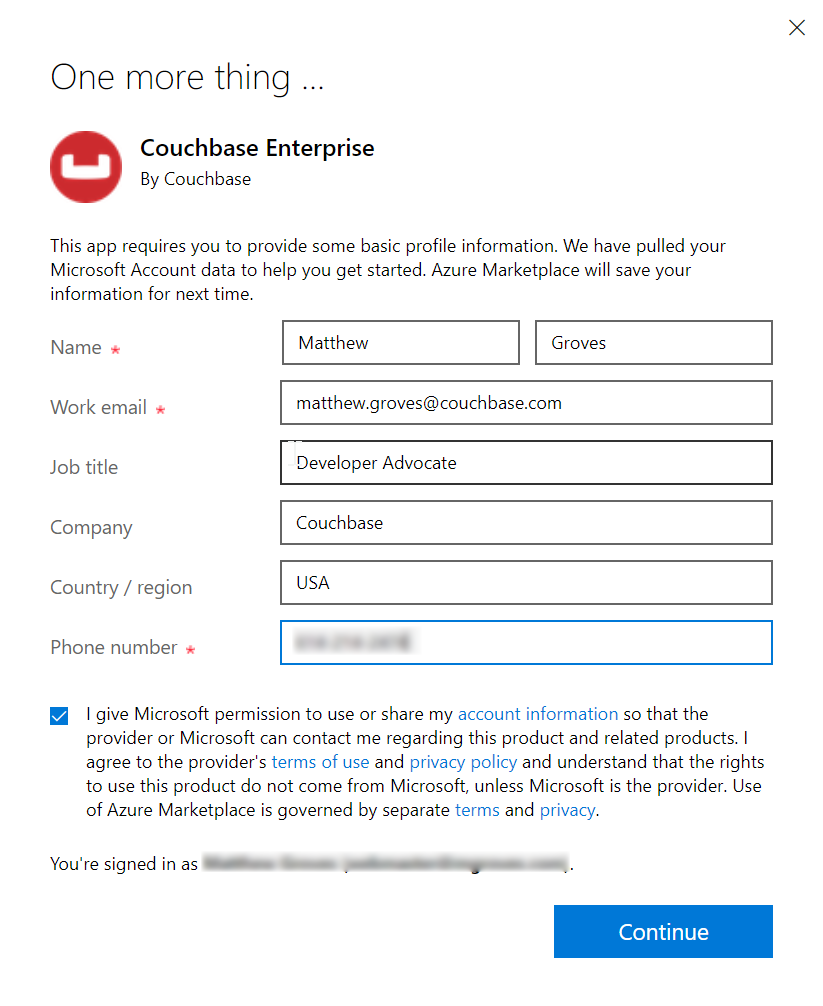
The only thing you need before you start is a Microsoft account, which is free.
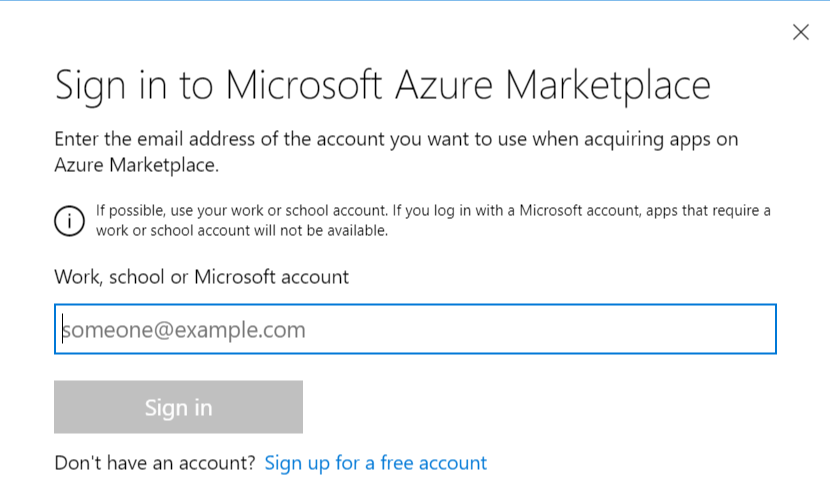
Start by going to the Couchbase Enterprise product page on Azure.
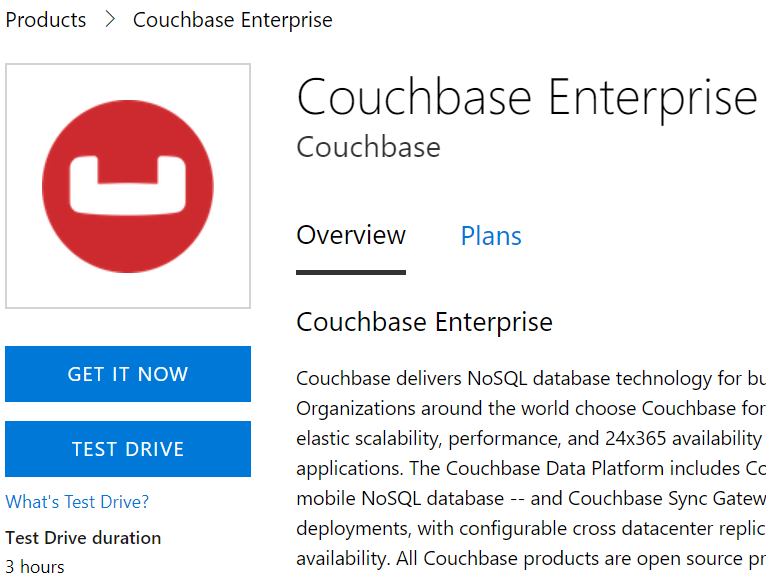
There’s a big "Test Drive" button. Simply click to get started.
Before you click to get started, notice that the Test Drive has a limited duration. You will get 3 hours to evaluate Couchbase Server.
Step by Step Evaluation Labs
We’ve prepared 4 step-by-step labs that you can follow to start evaluating Couchbase Server.
The test drive deployment is a fully functional Couchbase Server Enterprise cluster with all features enabled. The only limit you have is time.
Summary
Couchbase is proud to partner with Microsoft to make this test drive available to you.
If you are interested in learning more about Couchbase on Azure, please check out these other blog posts:
If you have any questions, comments, or suggestions, please leave a comment, email me [email protected], or tweet me @mgroves on Twitter.
This is a repost that originally appeared on the Couchbase Blog: Scaling Couchbase Server on Azure.
Scaling is one of Couchbase Server’s strengths. It’s easy to scale, and Couchbase’s architecture makes an efficient use of your scaling resources. In fact, when Couchbase customer Viber switched from Mongo to Couchbase, they cut the number of servers they needed in half.
This blog post is the third in a (loose) series of posts on Azure.
The first post showed you the benefits of serverless computing on Azure with Couchbase.
The second post showed a concrete example of creating a chatbot using Azure functions and Couchbase Server.
The previous post only used a cluster with a single node for demonstration purposes. Now suppose you’ve been in production for a while, and your chatbot is starting to get really popular. You need to scale up your Couchbase cluster. If you deployed Couchbase from the Azure Marketplace, this is a piece of cake. Long story short: you pretty much just move a slider. But this post will take you all the way through the details:
-
Creating a brand new cluster with 3 nodes.
-
Scaling the cluster up to 5 nodes.
-
Scaling the cluster down to 4 nodes.
Create Couchbase Cluster on Azure
Assuming you have an Azure account, login to the portal. If you don’t yet, Getting Started with Azure is Easy and Free.
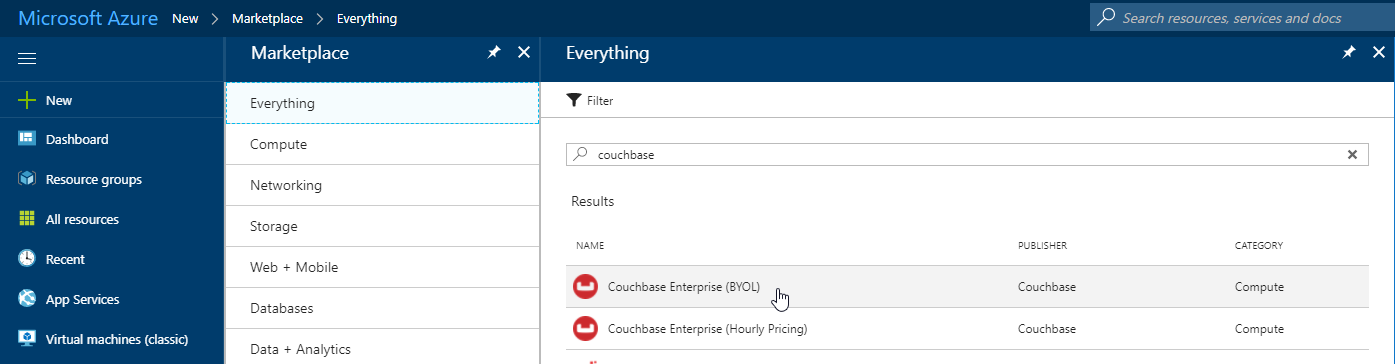
Once you’re logged in, click "+ New" and search for Couchbase Server in the marketplace. I’m using BYOL (bring your own license) for demonstration, but there is also an "Hourly Pricing" option that comes with silver support.
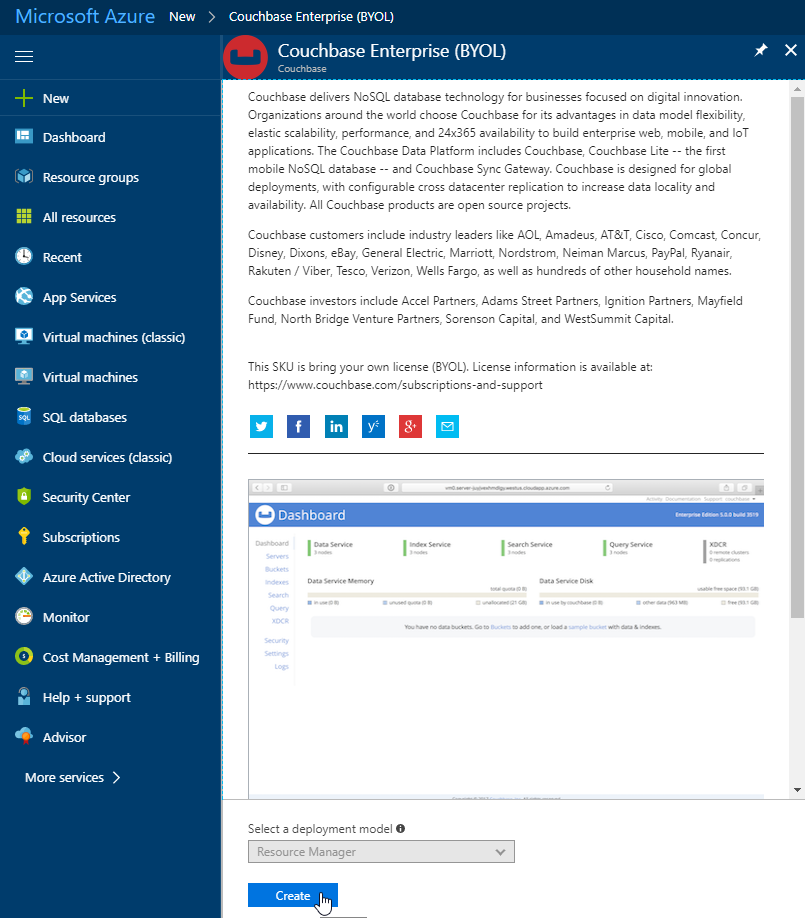
Once you select Couchbase, you’ll be taken through an Azure installation wizard. Click the "Create" button to get started.
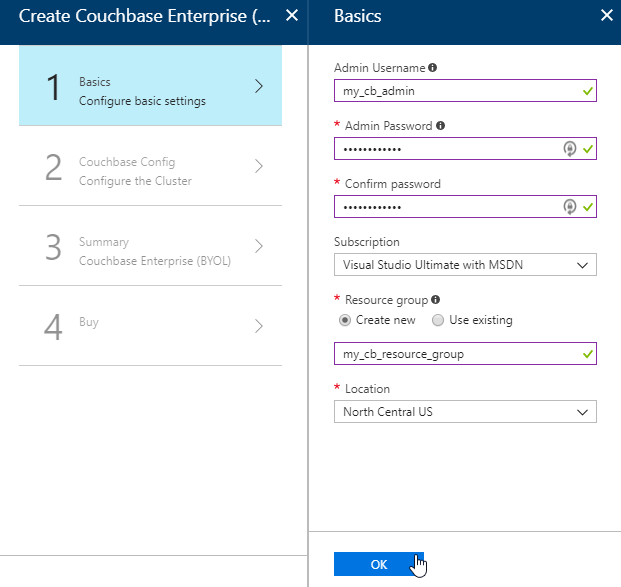
Step 1 is the "Basics". Fill out the username and password you want for Couchbase, the name of a resource group, and a location (I chose North Central US because it is close to me geographically). Make sure to make a note of this information, as you’ll need it later.
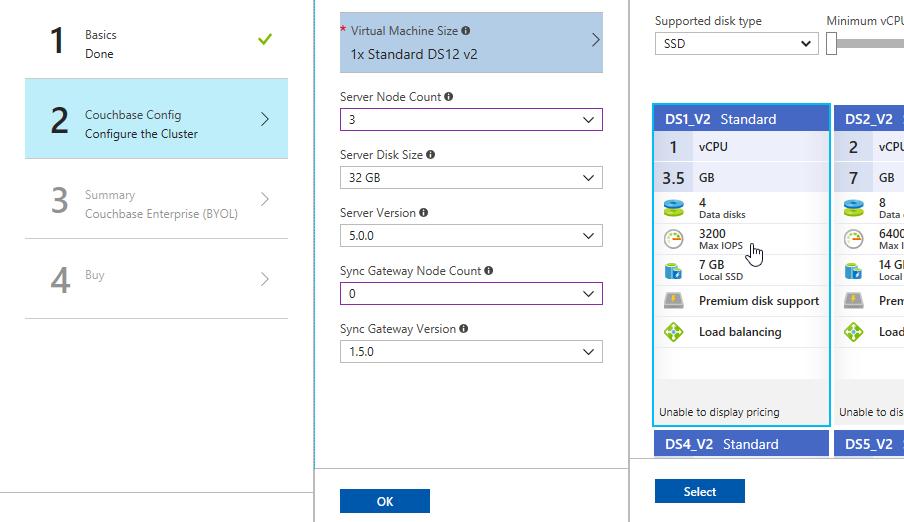
The next step is Couchbase Config. There are some recommended VM types to use. I went with DS1_V2 to keep this blog post cheap, but you probably want at least 4 cores and 4gb of RAM for your production environment. I also elected not to install any Sync Gateway Nodes, but if you plan to use Couchbase Mobile, you will need these too. I’m asking for a total of 3 nodes for Couchbase Server.
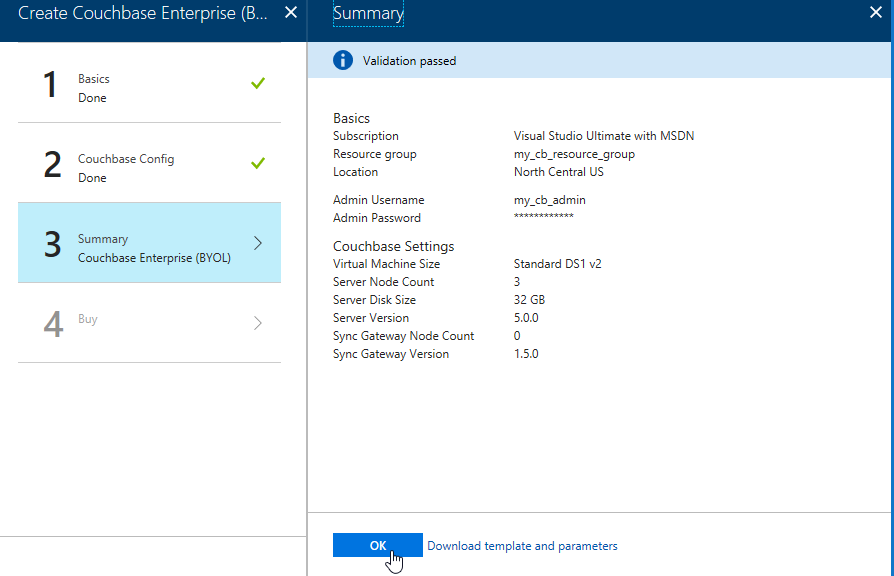
After this, step 3 is just a summary of the information you’ve entered.
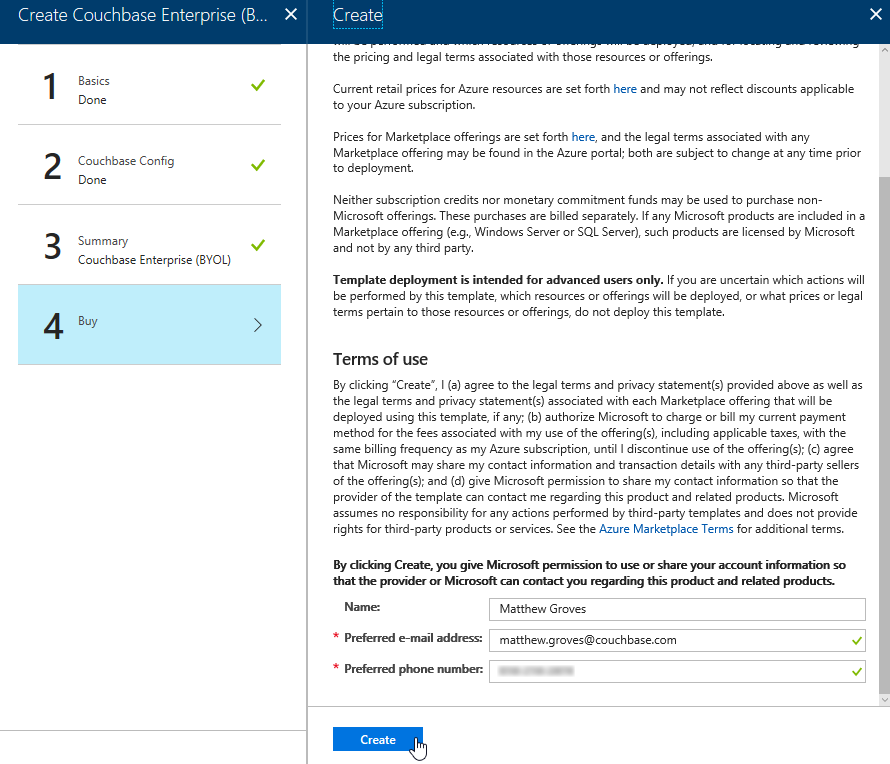
The last step is "buy". This shows you the terms. One "Create" button is all that remains.
Now, Azure will go to work provisioning 3 VMs, installing Couchbase Server on them, and then creating a cluster. This will take a little bit of time. You’ll get an Azure notification when it’s done.
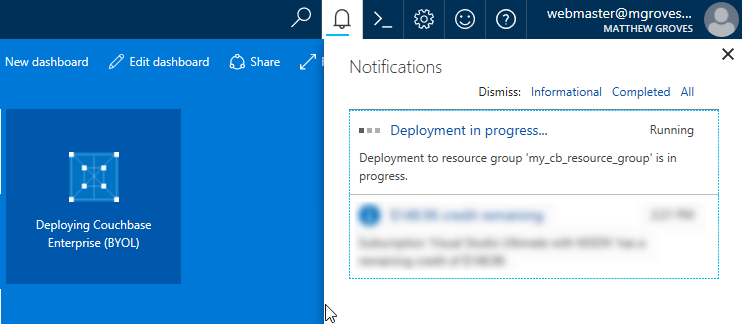
You should have just enough time to get yourself a nice beverage.
Using your Couchbase Cluster
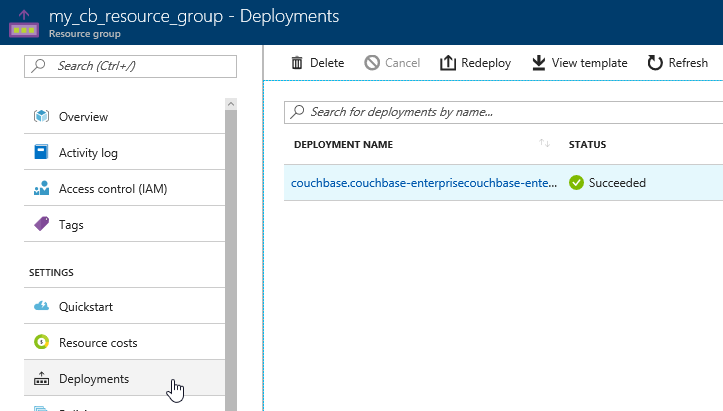
When Azure finishes with deployment, go look at "Resource groups" in the Azure portal. Find your resource group. Mine was called my_cb_resource_group.
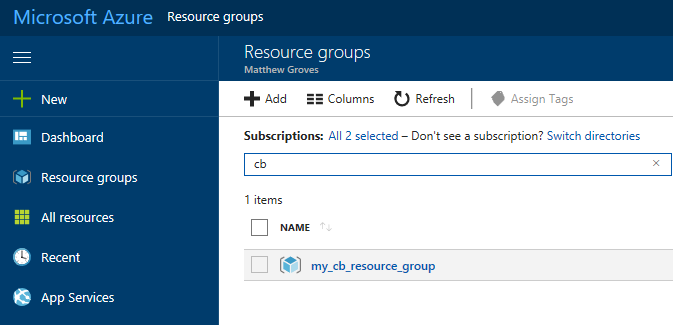
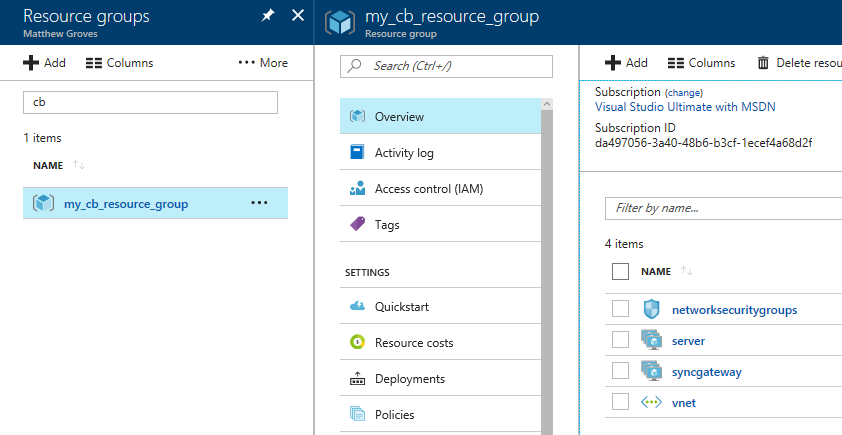
Click on the resource group. Inside that resource group, you’ll see 4 things:
-
networksecuritygroups (these are firewall rules, essentially)
-
vnet (the network that all the resources in the group are on)
-
server (Couchbase Server instances)
-
syncgateway (Couchbase Sync Gateway instances. I didn’t ask for any, so this is an empty grouping)
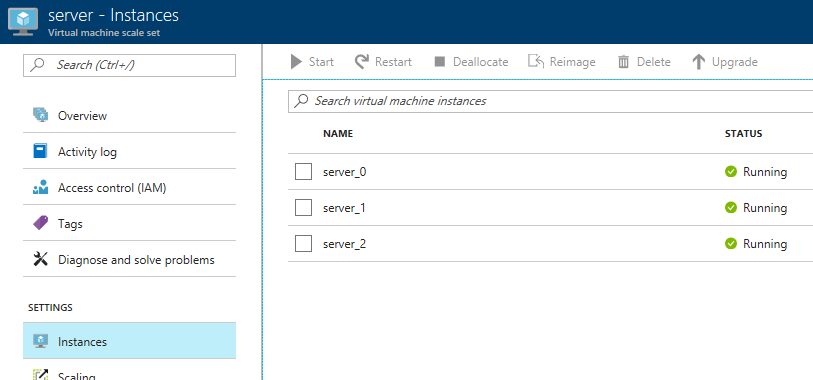
First, click 'server', and then 'instances'. You should see 3 servers (or however many you provisioned).
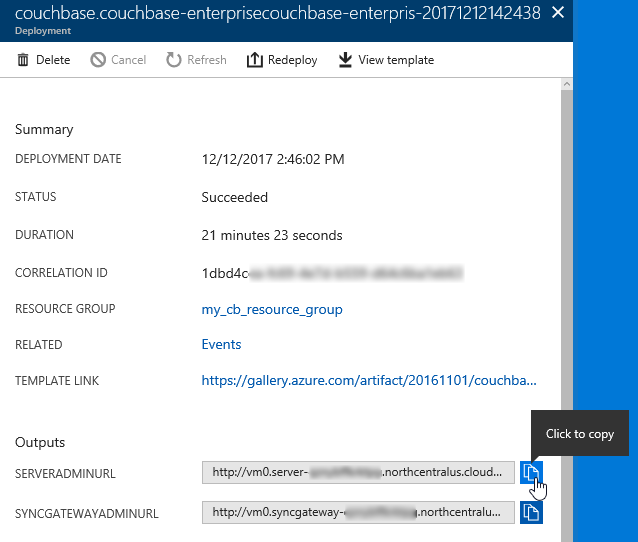
Next, click 'deployments'. You should see one for Couchbase listed. Click it for more information about the deployment.
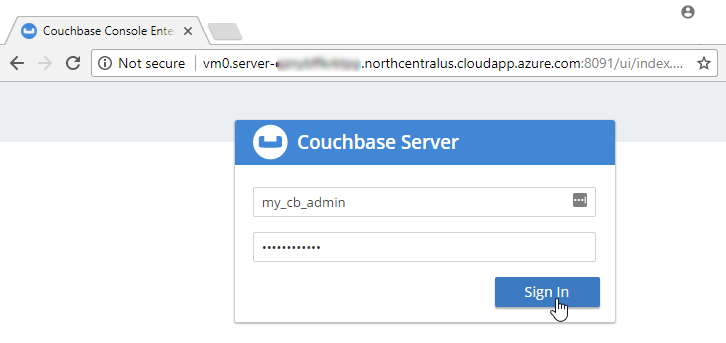
The next screen will tell you the URL that you need to get to the Couchbase Server UI (and Sync Gateway UI if you installed that). It should look something like: http://vm0.server-foobarbazqux.northcentralus.cloudapp.azure.com:8091.
Paste that URL into a browser. You will be taken to the Couchbase Server login screen. Use the credentials you specified earlier to login.
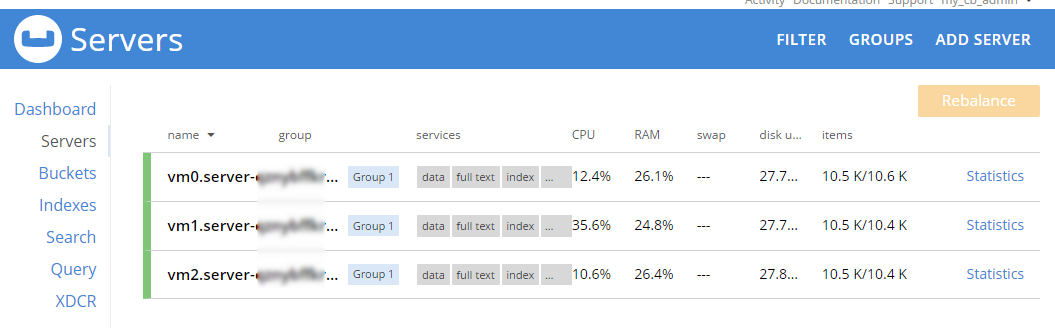
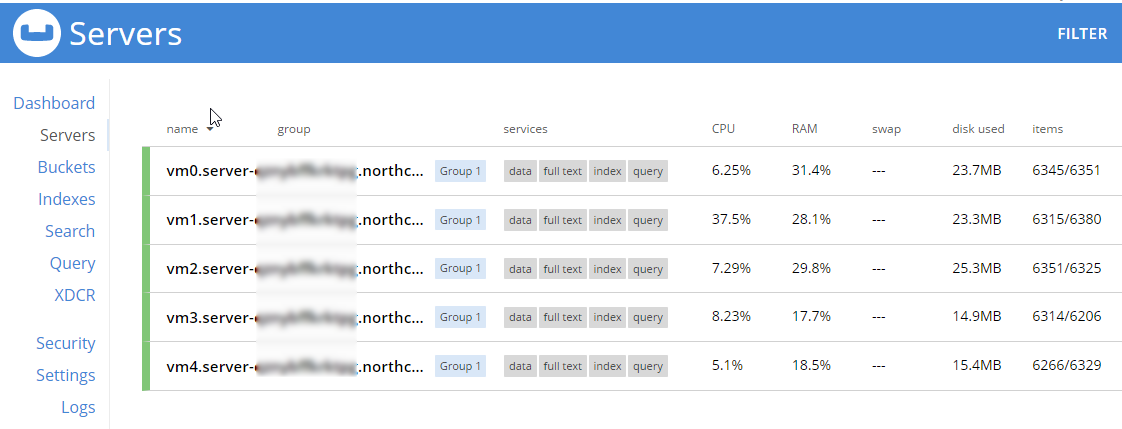
After you login, click on 'servers'. You will see the three servers listed here. The URLs will match the deployments you see in the Azure portal.
Let’s put some data in this database! Go to Settings → Sample Buckets and load the 'travel-sample' bucket.
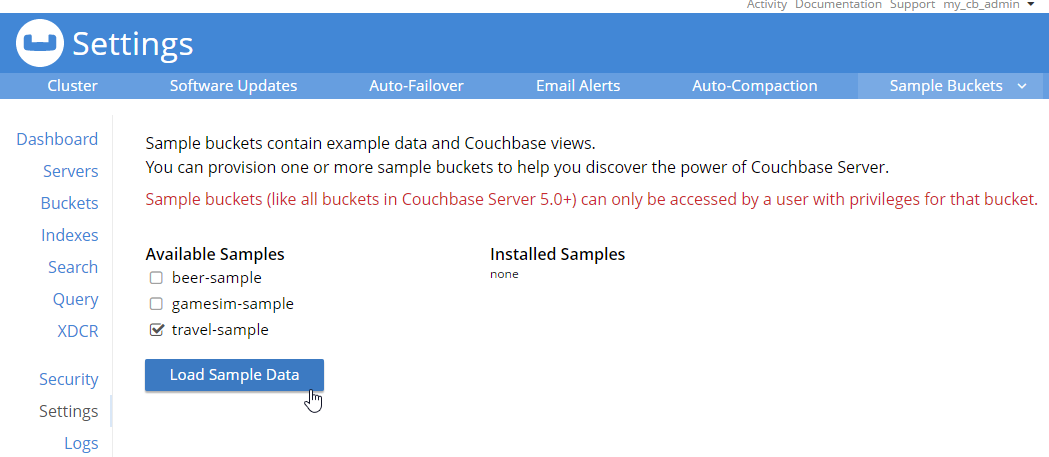
This sample data contains 31591 documents. When it’s done loading, go back to "servers". You can see how the 'items' (and replica items) are evenly distributed amongst the three servers. Each node in Couchbase can do both reads and writes, so this is not a master/slave or a read-only replica sets situation.
Scaling up
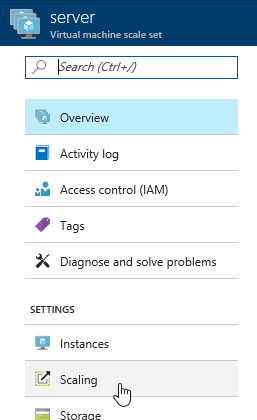
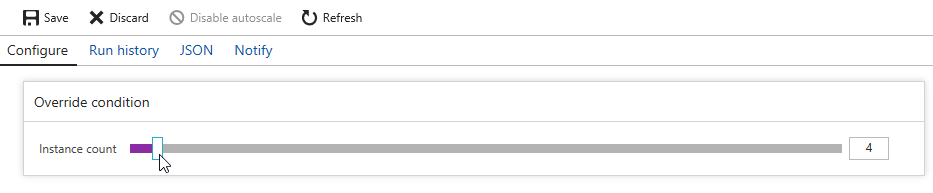
Now, let’s suppose your application is really taking off, and you need to scale up to provide additional capacity, storage, performance. Since we’re using Couchbase deployed from the Azure marketplace, this is even easier than usual. Go to the Azure portal, back to the resource group, and click "server" again. Now click "scaling"
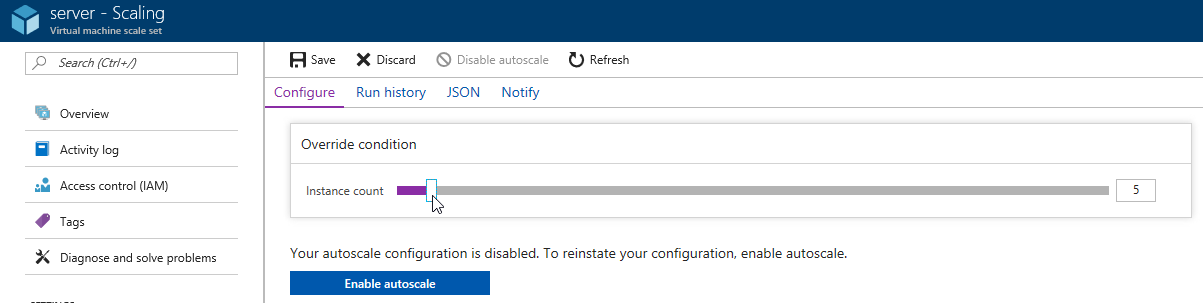
Next, you will see a slider that you can adjust to add more instances. Let’s bump it up to 5 total servers. Make sure to click "save".
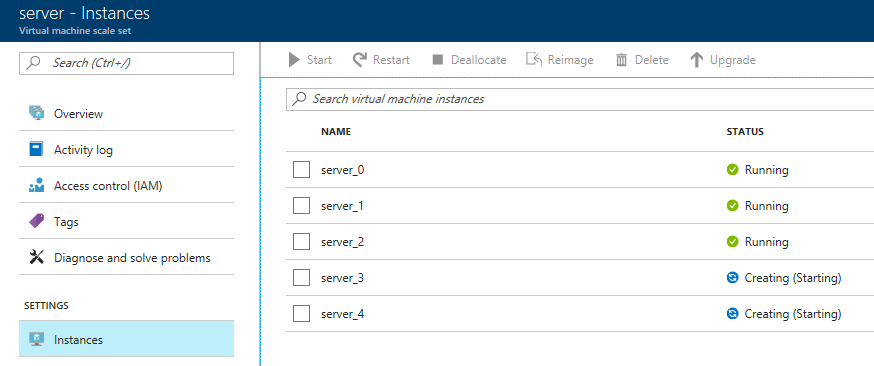
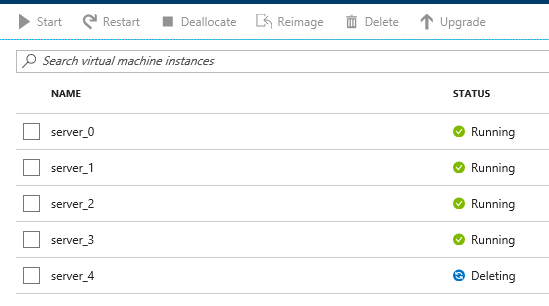
Now, go back to 'instances' again. Note: you may have to refresh the page. Azure doesn’t seem to want to update the stale page served to the browser on its own. You will now see server_3 and server_4 in "creating" status.
You will need to wait for these to be deployed by Azure. In the meantime, you can go back over to the Couchbase Server UI and wait for them to appear there as well.
When adding new servers, the cluster must be rebalanced. The Azure deployment should attempt to do this automatically (but just in case it fails, you can trigger the rebalance manually too).
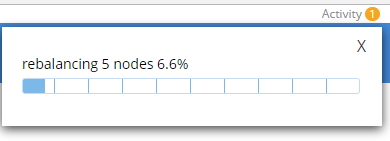
During this rebalance period, the cluster is still accessible from your applications. There will be no downtime. After the rebalance is over, you can see that the # of items on each server has changed. It’s been redistributed (along with replicas).
That’s it. It’s pretty much just moving a slider and waiting a few minutes.
Scaling Down
At some point, you may want to scale down your cluster. Perhaps you need 5 servers during a certain part of the year, but you only need 3 for other parts, and you’d like to save some money on your Azure bill.
Once again, this is just a matter of adjusting the slider. However, it’s a good idea to scale down one server at a time to avoid any risk of data loss.
When you scale down, Azure will pick a VM to decommission. Couchbase Server can respond in one of two ways:
-
Default behavior is to simply indicate that a node is down. This could trigger an email alert. It will show as 'down' in the UI.
-
Auto-failover can be turned on. This means that once a node is down, the Couchbase cluster will automatically consider it 'failed', promote the replicas on other nodes, and rebalance the cluster.
I’m going to leave auto-failover off and show the default behavior.
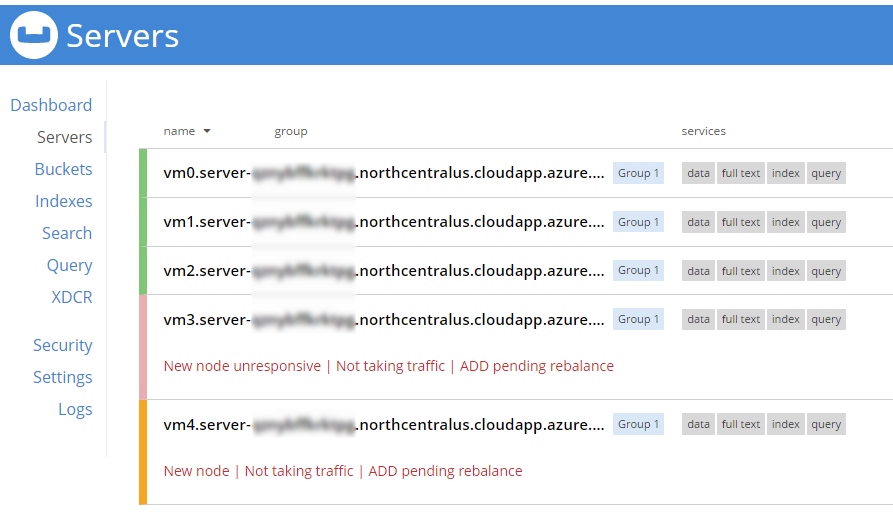
First, the server will show a status of 'deleting' in the Azure portal.
Soon after, Couchbase will recognize that a node is not responsive. It will suggest failover to 'activate available replicas'.
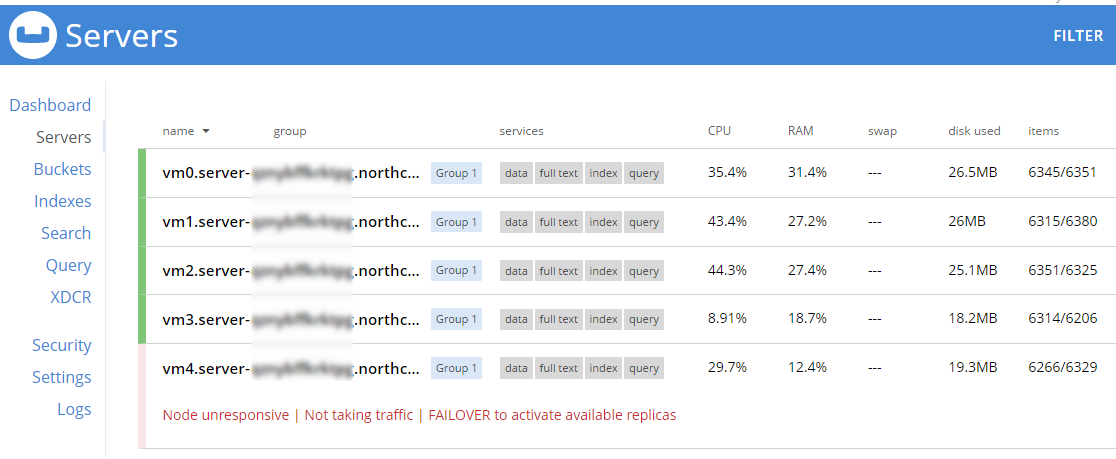
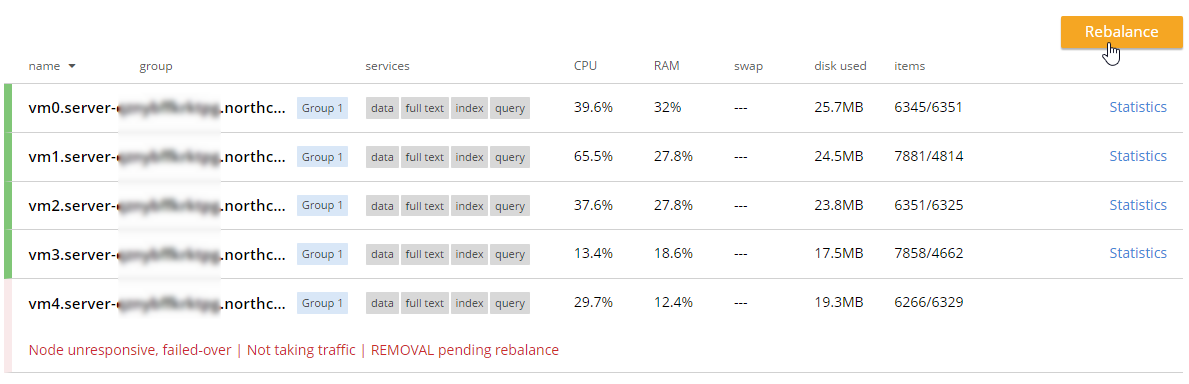
I’ll go ahead and do just that.

Once it’s removed from the cluster, you’ll need to trigger a 'rebalance'.
Summary and resources
Scaling a Couchbase cluster on Azure is simply a matter of using the slider.
If you’re scaling down, consider doing it one node at a time.
For more information, check out these resources:
-
A video by Ben Lackey covering the scaling process of Couchbase on Azure.
-
Make sure to read up on Auto-failover in the documentation.
-
Also check out the documentation on rebalancing.
If you have questions, please contact me on Twitter @mgroves or leave a comment.
