Posts tagged with 'cloud'

Jamie Phillips is writing infrastructure as code. This episode is not sponsored! Want to be a sponsor? You can contact me or check out my sponsorship gig on Fiverr
Show Notes:
-
HCL, and yes it does kinda look like CSS
-
It was just last week, but make sure you don’t miss Jamie’s episode on Packer!
Want to be on the next episode? You can! All you need is the willingness to talk about something technical.

Michael Eaton talks with me on a variety of topics. This episode is sponsored by Smartsheet.
Show Notes:
-
SAFe. Those diagrams absolutely scream "Individuals and interactions over processes and tools" and "Responding to change over following a plan" if you ask me.
-
Perl is a language, most criticized for looking like unreadable "line noise". But that may be an unfair criticism. If you love Perl, contact me and let’s get you on the show.
-
Blog: Same Stuff Different Day
-
Blog: Thoughts on Writing
-
Premise vs premises, and if you can’t remember, just say "on prem" like me :)
Want to be on the next episode? You can! All you need is the willingness to talk about something technical.
Music is by Joe Ferg, check out more music on JoeFerg.com!

Andrea Cremese is building and using Saas.
Show Notes:
-
The Henry Ford quote appears to be apocryphal: Henry Ford, Innovation, and That “Faster Horse†Quote
-
Podcast: The Top by Nathan Latka
-
Interview with Aaron Levy, the CEO of box
-
Movie: Abacus: small enough to jail
Want to be on the next episode? You can! All you need is the willingness to talk about something technical.
Music is by Joe Ferg, check out more music on JoeFerg.com!
This is a repost that originally appeared on the Couchbase Blog: Test Drive: Trying Couchbase on Azure for Free.
Test Drive is an Azure feature that allows you to try out software in the cloud for free.
Previously, I wrote about how Getting started with Couchbase on Azure is easy and free. That post told you how to get started with $200 in Azure credit. With Test Drive, however, it’s even easier to get started, and you don’t have to use any of that $200 credit.
Test Drive on Azure Marketplace
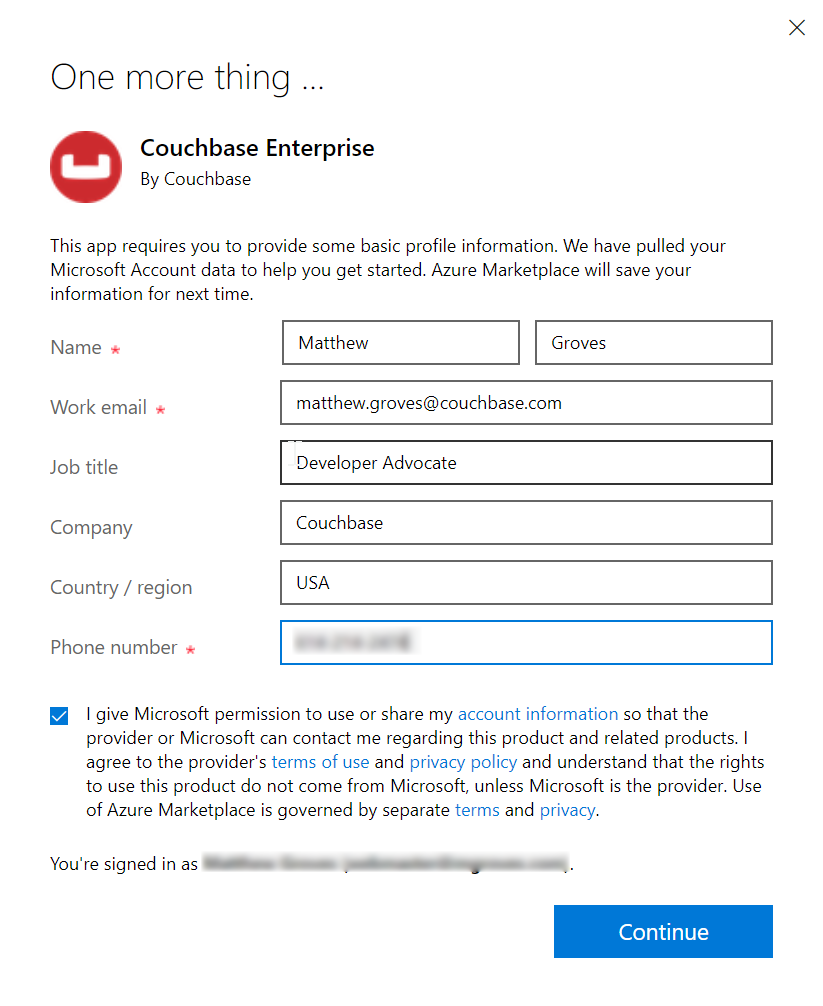
The only thing you need before you start is a Microsoft account, which is free.
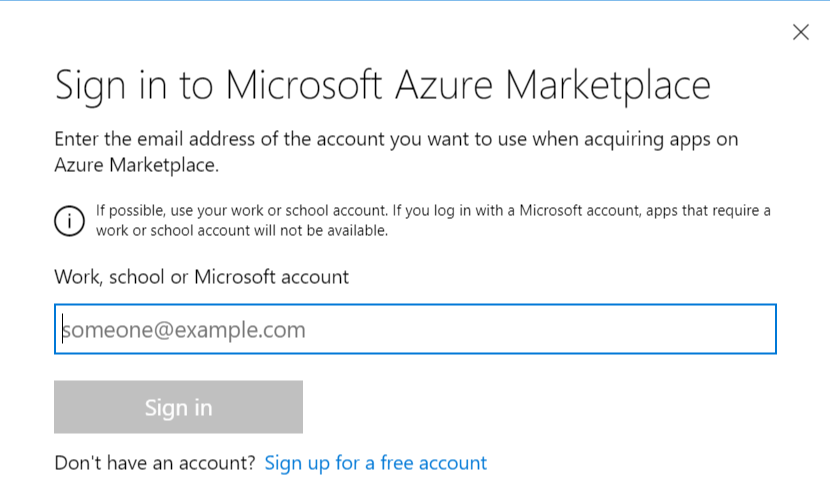
Start by going to the Couchbase Enterprise product page on Azure.
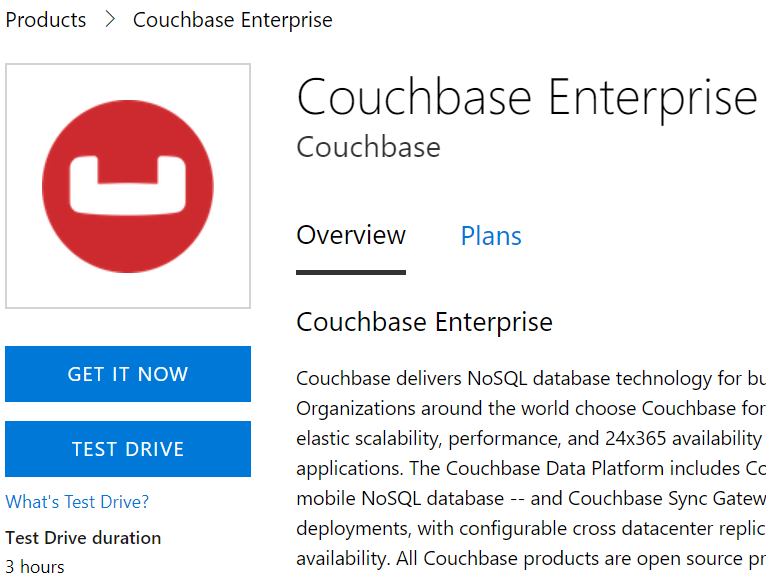
There’s a big "Test Drive" button. Simply click to get started.
Before you click to get started, notice that the Test Drive has a limited duration. You will get 3 hours to evaluate Couchbase Server.
Step by Step Evaluation Labs
We’ve prepared 4 step-by-step labs that you can follow to start evaluating Couchbase Server.
The test drive deployment is a fully functional Couchbase Server Enterprise cluster with all features enabled. The only limit you have is time.
Summary
Couchbase is proud to partner with Microsoft to make this test drive available to you.
If you are interested in learning more about Couchbase on Azure, please check out these other blog posts:
If you have any questions, comments, or suggestions, please leave a comment, email me [email protected], or tweet me @mgroves on Twitter.
This is a repost that originally appeared on the Couchbase Blog: Scaling Couchbase Server on Azure.
Scaling is one of Couchbase Server’s strengths. It’s easy to scale, and Couchbase’s architecture makes an efficient use of your scaling resources. In fact, when Couchbase customer Viber switched from Mongo to Couchbase, they cut the number of servers they needed in half.
This blog post is the third in a (loose) series of posts on Azure.
The first post showed you the benefits of serverless computing on Azure with Couchbase.
The second post showed a concrete example of creating a chatbot using Azure functions and Couchbase Server.
The previous post only used a cluster with a single node for demonstration purposes. Now suppose you’ve been in production for a while, and your chatbot is starting to get really popular. You need to scale up your Couchbase cluster. If you deployed Couchbase from the Azure Marketplace, this is a piece of cake. Long story short: you pretty much just move a slider. But this post will take you all the way through the details:
-
Creating a brand new cluster with 3 nodes.
-
Scaling the cluster up to 5 nodes.
-
Scaling the cluster down to 4 nodes.
Create Couchbase Cluster on Azure
Assuming you have an Azure account, login to the portal. If you don’t yet, Getting Started with Azure is Easy and Free.
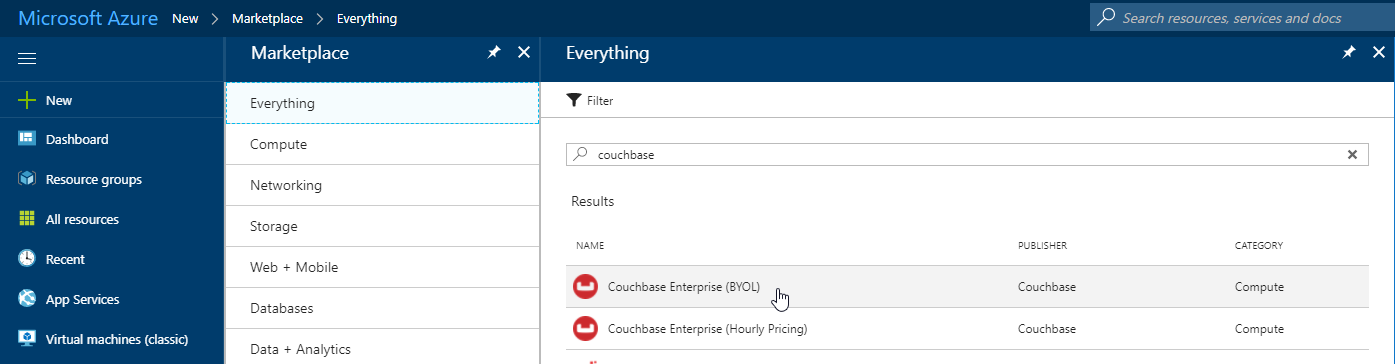
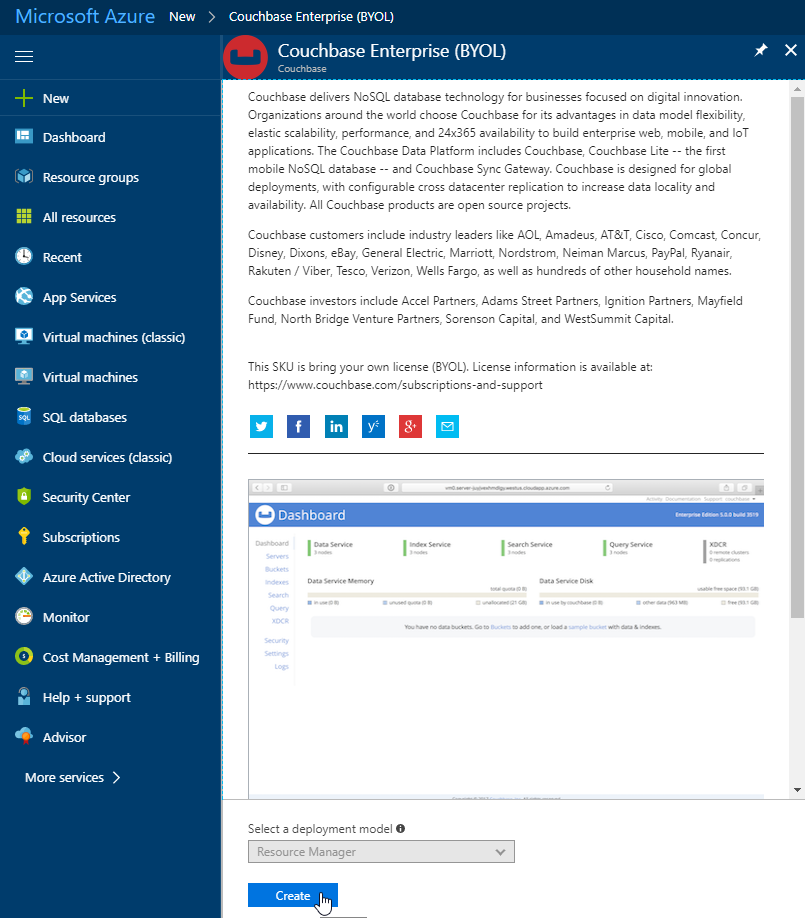
Once you’re logged in, click "+ New" and search for Couchbase Server in the marketplace. I’m using BYOL (bring your own license) for demonstration, but there is also an "Hourly Pricing" option that comes with silver support.
Once you select Couchbase, you’ll be taken through an Azure installation wizard. Click the "Create" button to get started.
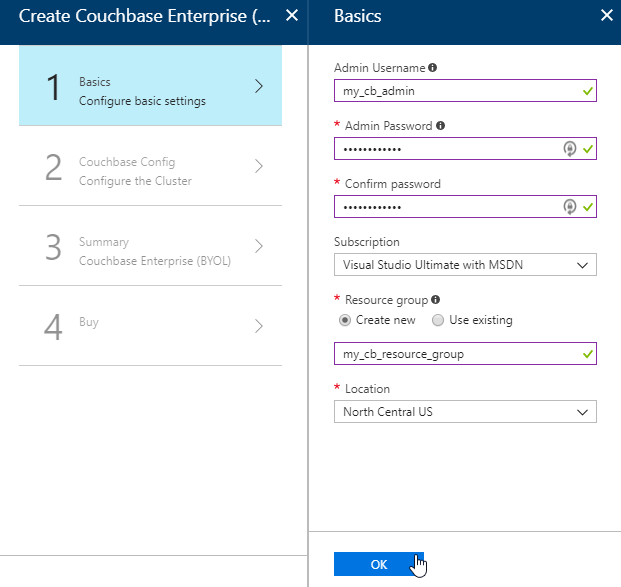
Step 1 is the "Basics". Fill out the username and password you want for Couchbase, the name of a resource group, and a location (I chose North Central US because it is close to me geographically). Make sure to make a note of this information, as you’ll need it later.
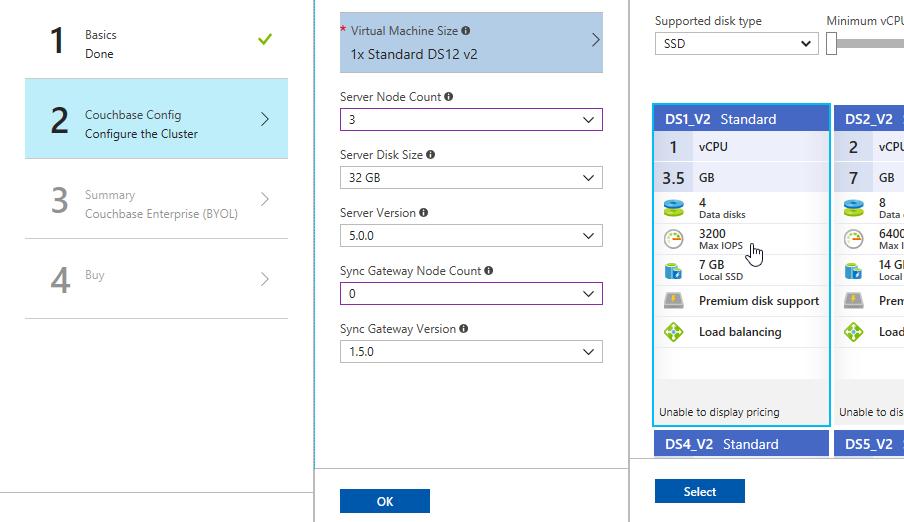
The next step is Couchbase Config. There are some recommended VM types to use. I went with DS1_V2 to keep this blog post cheap, but you probably want at least 4 cores and 4gb of RAM for your production environment. I also elected not to install any Sync Gateway Nodes, but if you plan to use Couchbase Mobile, you will need these too. I’m asking for a total of 3 nodes for Couchbase Server.
After this, step 3 is just a summary of the information you’ve entered.
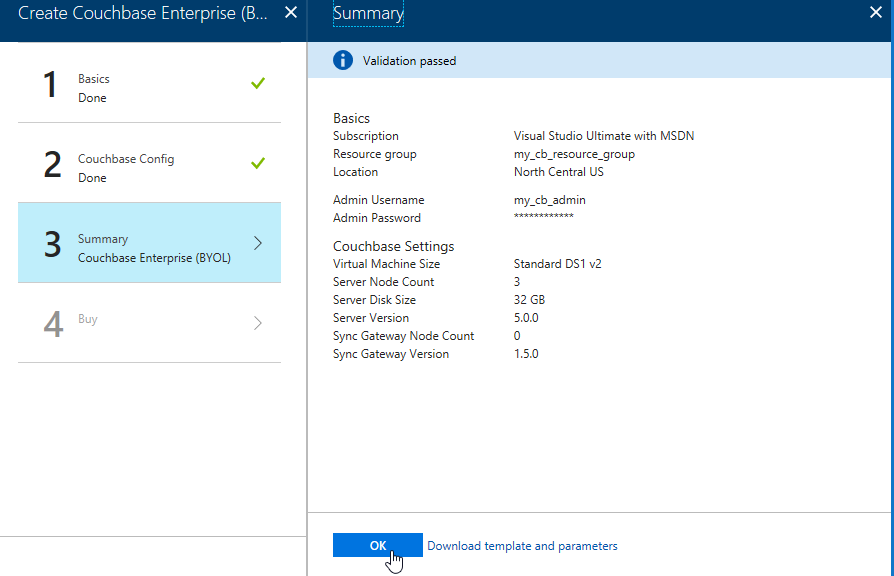
The last step is "buy". This shows you the terms. One "Create" button is all that remains.
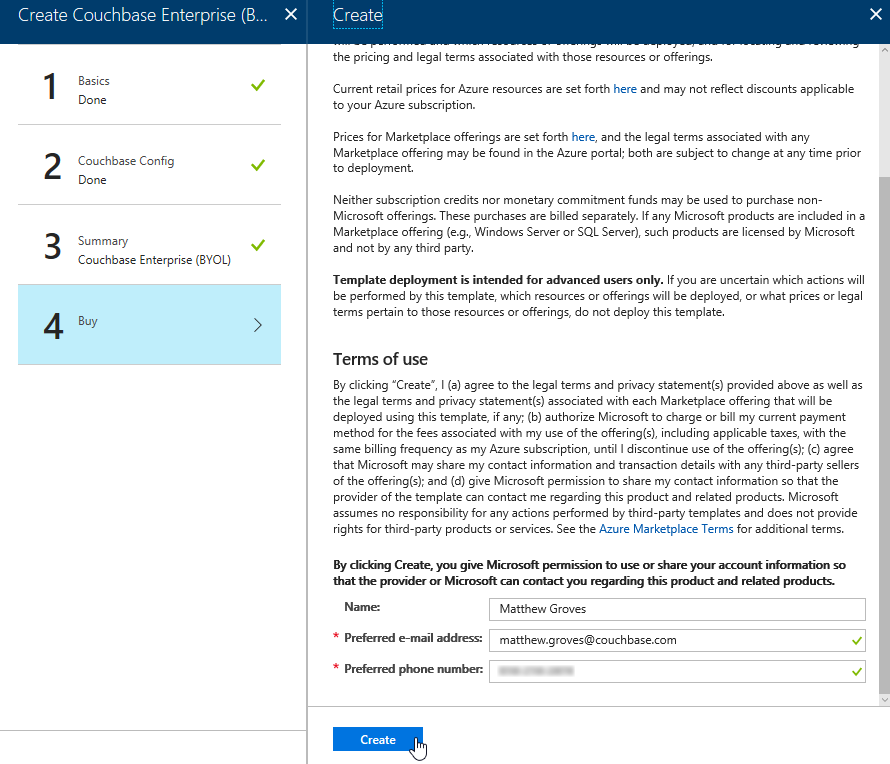
Now, Azure will go to work provisioning 3 VMs, installing Couchbase Server on them, and then creating a cluster. This will take a little bit of time. You’ll get an Azure notification when it’s done.
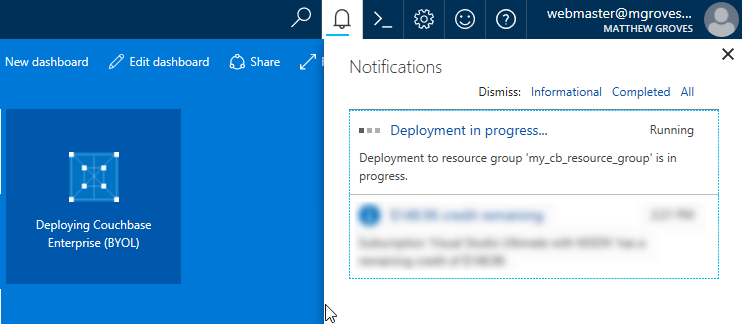
You should have just enough time to get yourself a nice beverage.
Using your Couchbase Cluster
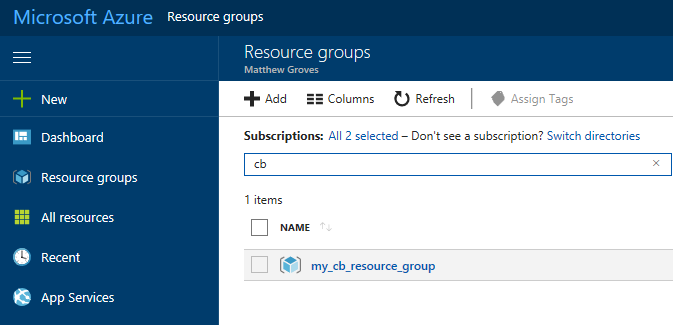
When Azure finishes with deployment, go look at "Resource groups" in the Azure portal. Find your resource group. Mine was called my_cb_resource_group.
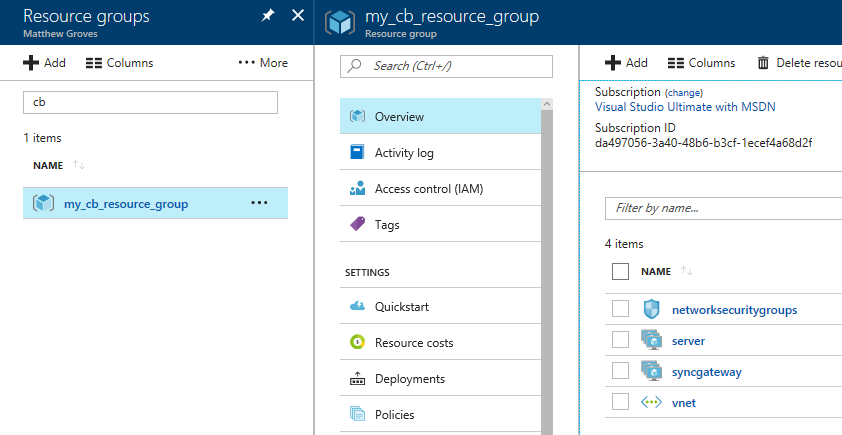
Click on the resource group. Inside that resource group, you’ll see 4 things:
-
networksecuritygroups (these are firewall rules, essentially)
-
vnet (the network that all the resources in the group are on)
-
server (Couchbase Server instances)
-
syncgateway (Couchbase Sync Gateway instances. I didn’t ask for any, so this is an empty grouping)
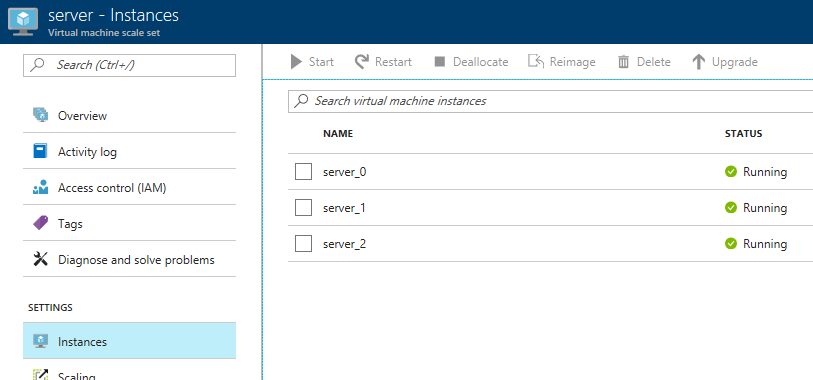
First, click 'server', and then 'instances'. You should see 3 servers (or however many you provisioned).
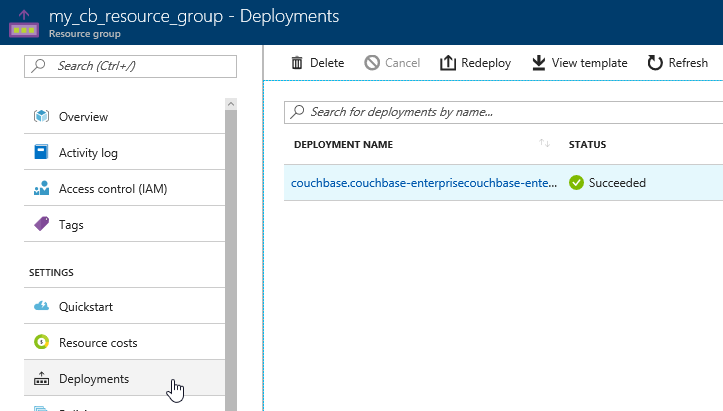
Next, click 'deployments'. You should see one for Couchbase listed. Click it for more information about the deployment.
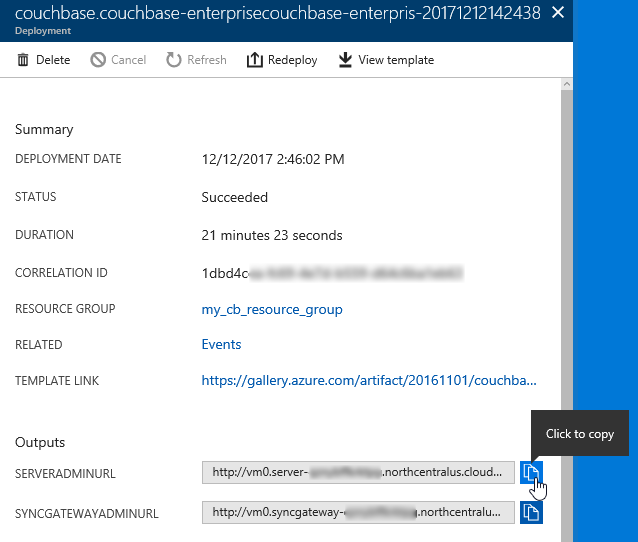
The next screen will tell you the URL that you need to get to the Couchbase Server UI (and Sync Gateway UI if you installed that). It should look something like: http://vm0.server-foobarbazqux.northcentralus.cloudapp.azure.com:8091.
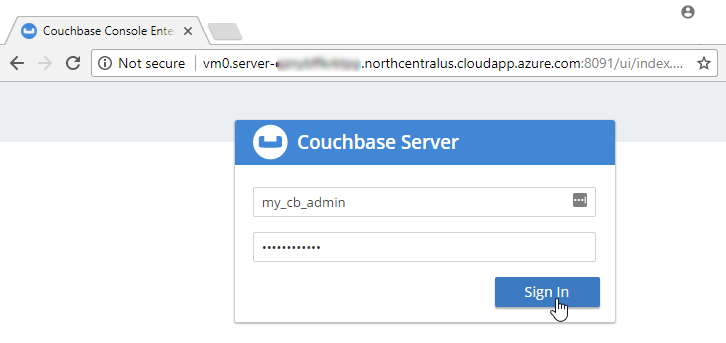
Paste that URL into a browser. You will be taken to the Couchbase Server login screen. Use the credentials you specified earlier to login.
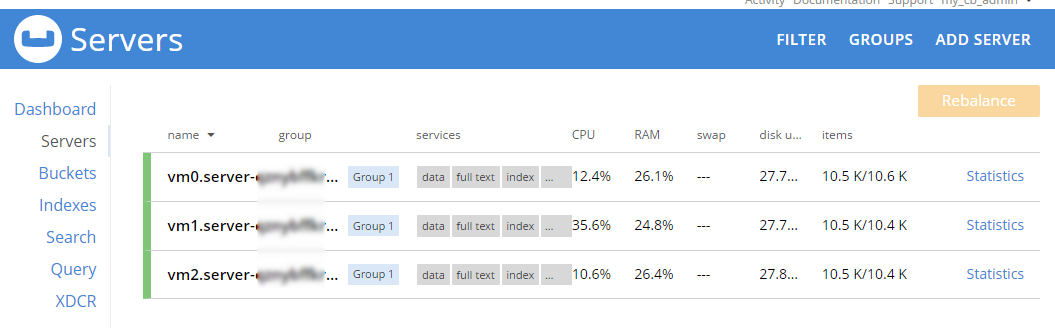
After you login, click on 'servers'. You will see the three servers listed here. The URLs will match the deployments you see in the Azure portal.
Let’s put some data in this database! Go to Settings → Sample Buckets and load the 'travel-sample' bucket.
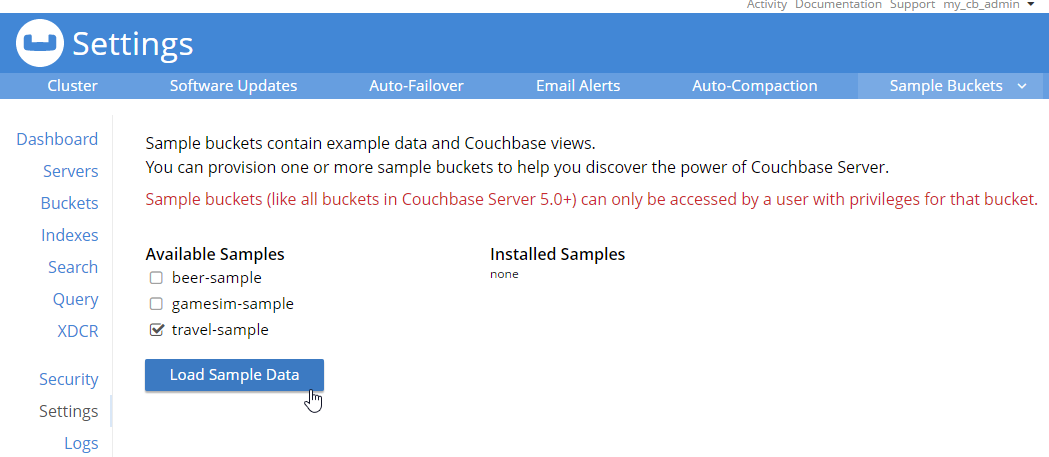
This sample data contains 31591 documents. When it’s done loading, go back to "servers". You can see how the 'items' (and replica items) are evenly distributed amongst the three servers. Each node in Couchbase can do both reads and writes, so this is not a master/slave or a read-only replica sets situation.
Scaling up
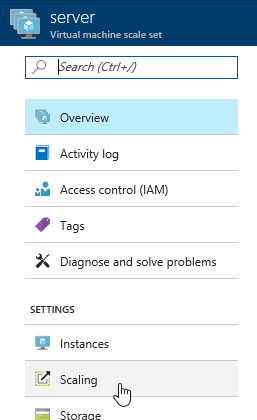
Now, let’s suppose your application is really taking off, and you need to scale up to provide additional capacity, storage, performance. Since we’re using Couchbase deployed from the Azure marketplace, this is even easier than usual. Go to the Azure portal, back to the resource group, and click "server" again. Now click "scaling"
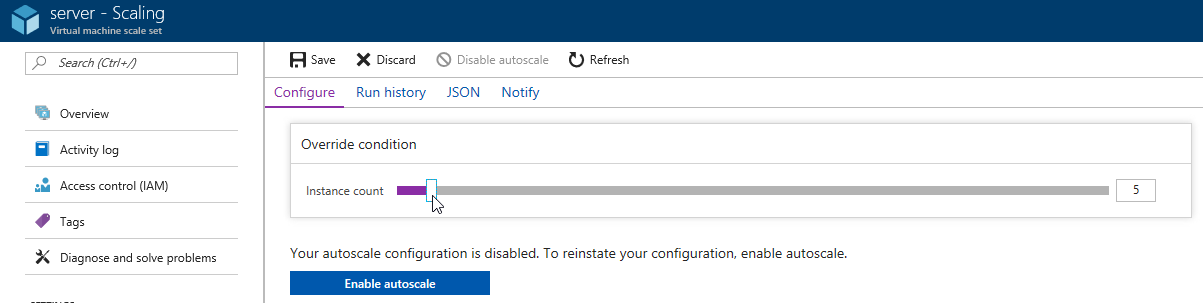
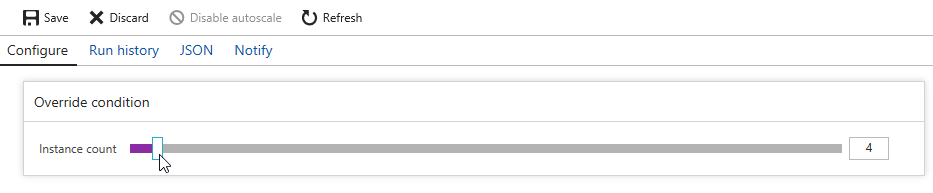
Next, you will see a slider that you can adjust to add more instances. Let’s bump it up to 5 total servers. Make sure to click "save".
Now, go back to 'instances' again. Note: you may have to refresh the page. Azure doesn’t seem to want to update the stale page served to the browser on its own. You will now see server_3 and server_4 in "creating" status.
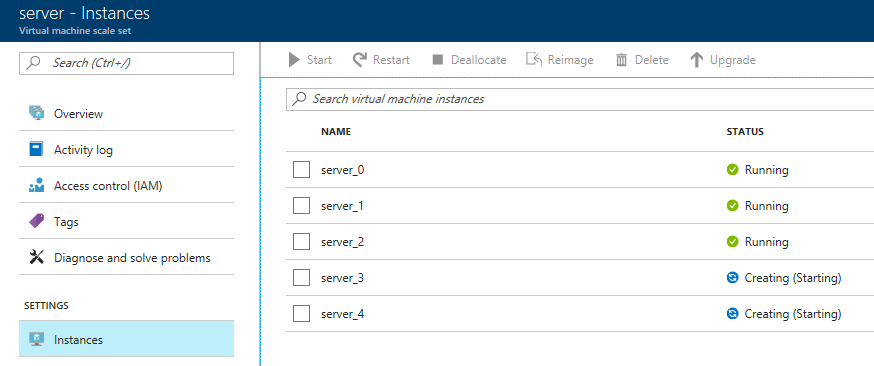
You will need to wait for these to be deployed by Azure. In the meantime, you can go back over to the Couchbase Server UI and wait for them to appear there as well.
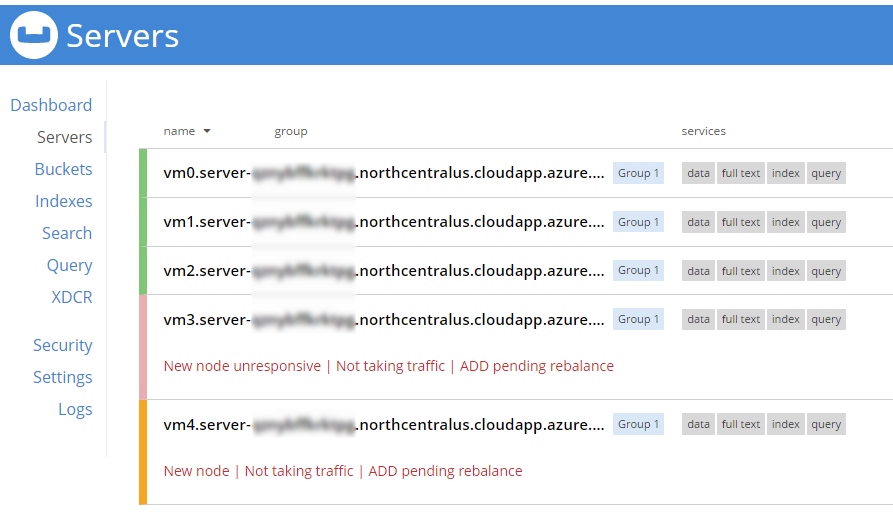
When adding new servers, the cluster must be rebalanced. The Azure deployment should attempt to do this automatically (but just in case it fails, you can trigger the rebalance manually too).
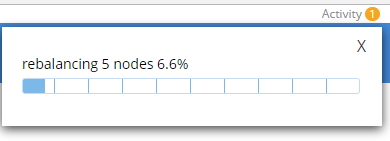
During this rebalance period, the cluster is still accessible from your applications. There will be no downtime. After the rebalance is over, you can see that the # of items on each server has changed. It’s been redistributed (along with replicas).
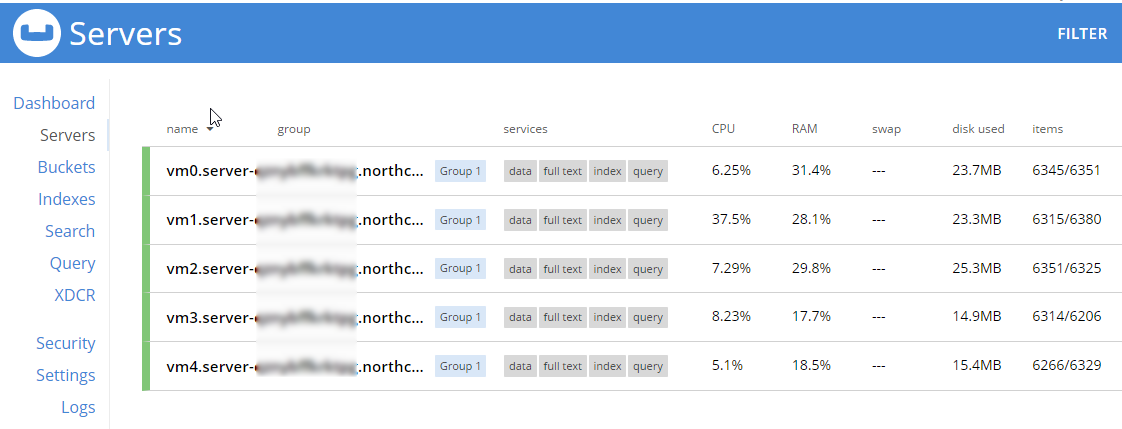
That’s it. It’s pretty much just moving a slider and waiting a few minutes.
Scaling Down
At some point, you may want to scale down your cluster. Perhaps you need 5 servers during a certain part of the year, but you only need 3 for other parts, and you’d like to save some money on your Azure bill.
Once again, this is just a matter of adjusting the slider. However, it’s a good idea to scale down one server at a time to avoid any risk of data loss.
When you scale down, Azure will pick a VM to decommission. Couchbase Server can respond in one of two ways:
-
Default behavior is to simply indicate that a node is down. This could trigger an email alert. It will show as 'down' in the UI.
-
Auto-failover can be turned on. This means that once a node is down, the Couchbase cluster will automatically consider it 'failed', promote the replicas on other nodes, and rebalance the cluster.
I’m going to leave auto-failover off and show the default behavior.
First, the server will show a status of 'deleting' in the Azure portal.
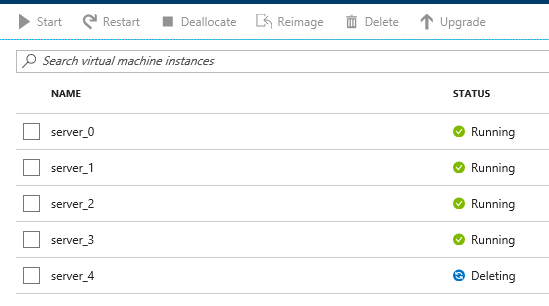
Soon after, Couchbase will recognize that a node is not responsive. It will suggest failover to 'activate available replicas'.
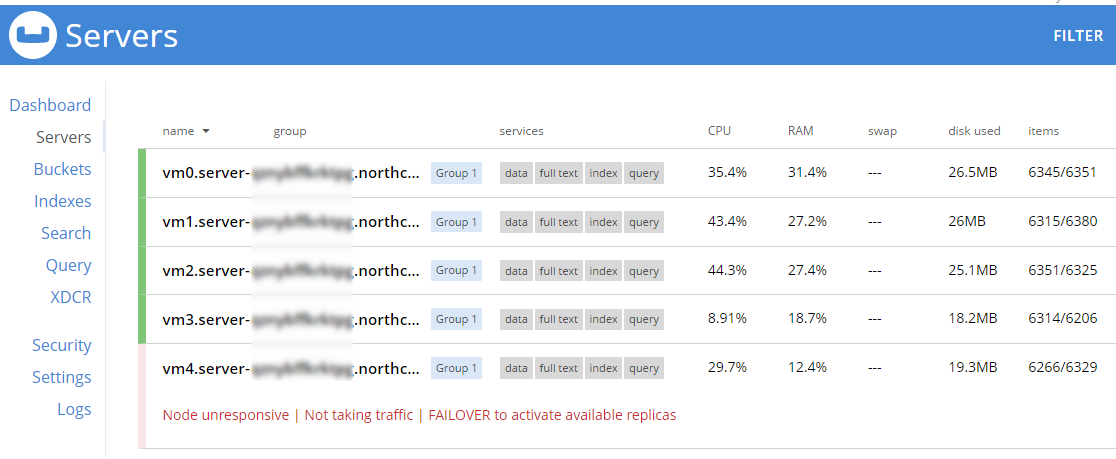
I’ll go ahead and do just that.

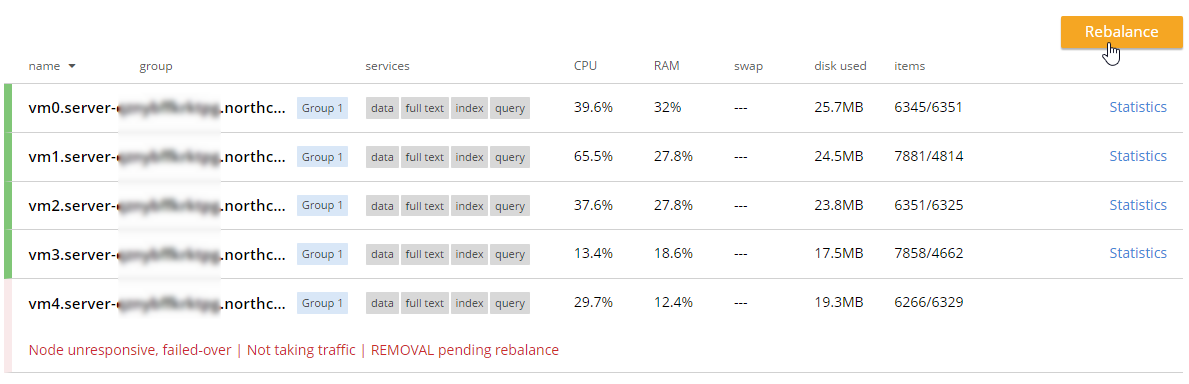
Once it’s removed from the cluster, you’ll need to trigger a 'rebalance'.
Summary and resources
Scaling a Couchbase cluster on Azure is simply a matter of using the slider.
If you’re scaling down, consider doing it one node at a time.
For more information, check out these resources:
-
A video by Ben Lackey covering the scaling process of Couchbase on Azure.
-
Make sure to read up on Auto-failover in the documentation.
-
Also check out the documentation on rebalancing.
If you have questions, please contact me on Twitter @mgroves or leave a comment.
