if(Session["IsLoggedIn"] = false)
Session["Username"] = "matt";Posts tagged with 'Couchbase Server'
This is a repost that originally appeared on the Couchbase Blog: Performance Testing and Load Testing Couchbase with Pillowfight.
Performance testing and load testing are important processes to help you make sure you are production ready. For testing Couchbase Server clusters, there is an open-source command line utility called "cbc-pillowfight". It’s part of libcouchbase.
Before you begin
You’ll need a Couchbase Server cluster up and running. You can try it out directly on your local machine (download Couchbase for Linux, Windows, and Mac) or in a Docker container.
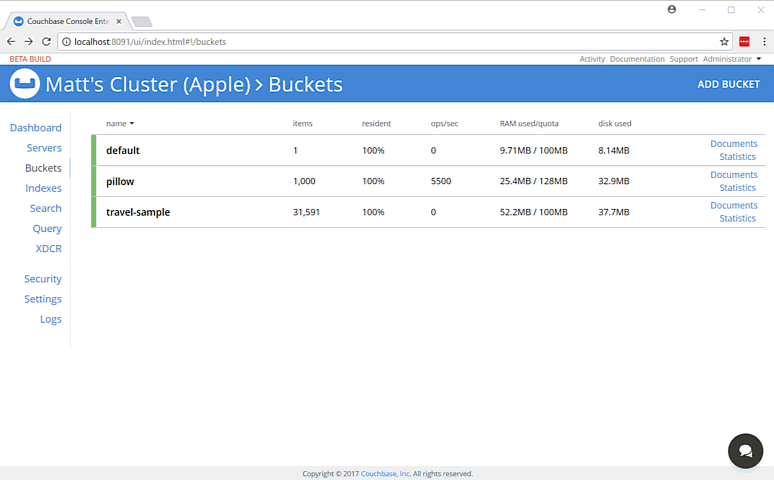
If you’re just trying out pillowfight, you may want to create a bucket on your cluster just for that purpose. I created a bucket called "pillow".
After you have Couchbase Server installed, you’ll need to download and install libcouchbase:
-
Mac:
brew install libcouchbase -
Windows: download a zip file (latest at the time of writing is libcouchbase-2.8.1)
For more information, including Linux instructions, check out the libcouchbase release notes.
Pillow fight for Performance Testing
If you used homebrew to install on a Mac, you can type cbc-pillowfight --help straight away for the command line help screen.
On Windows, unzip the libcouchbase zip file wherever you’d like. You’ll find cbc-pillowfight.exe in the bin folder.
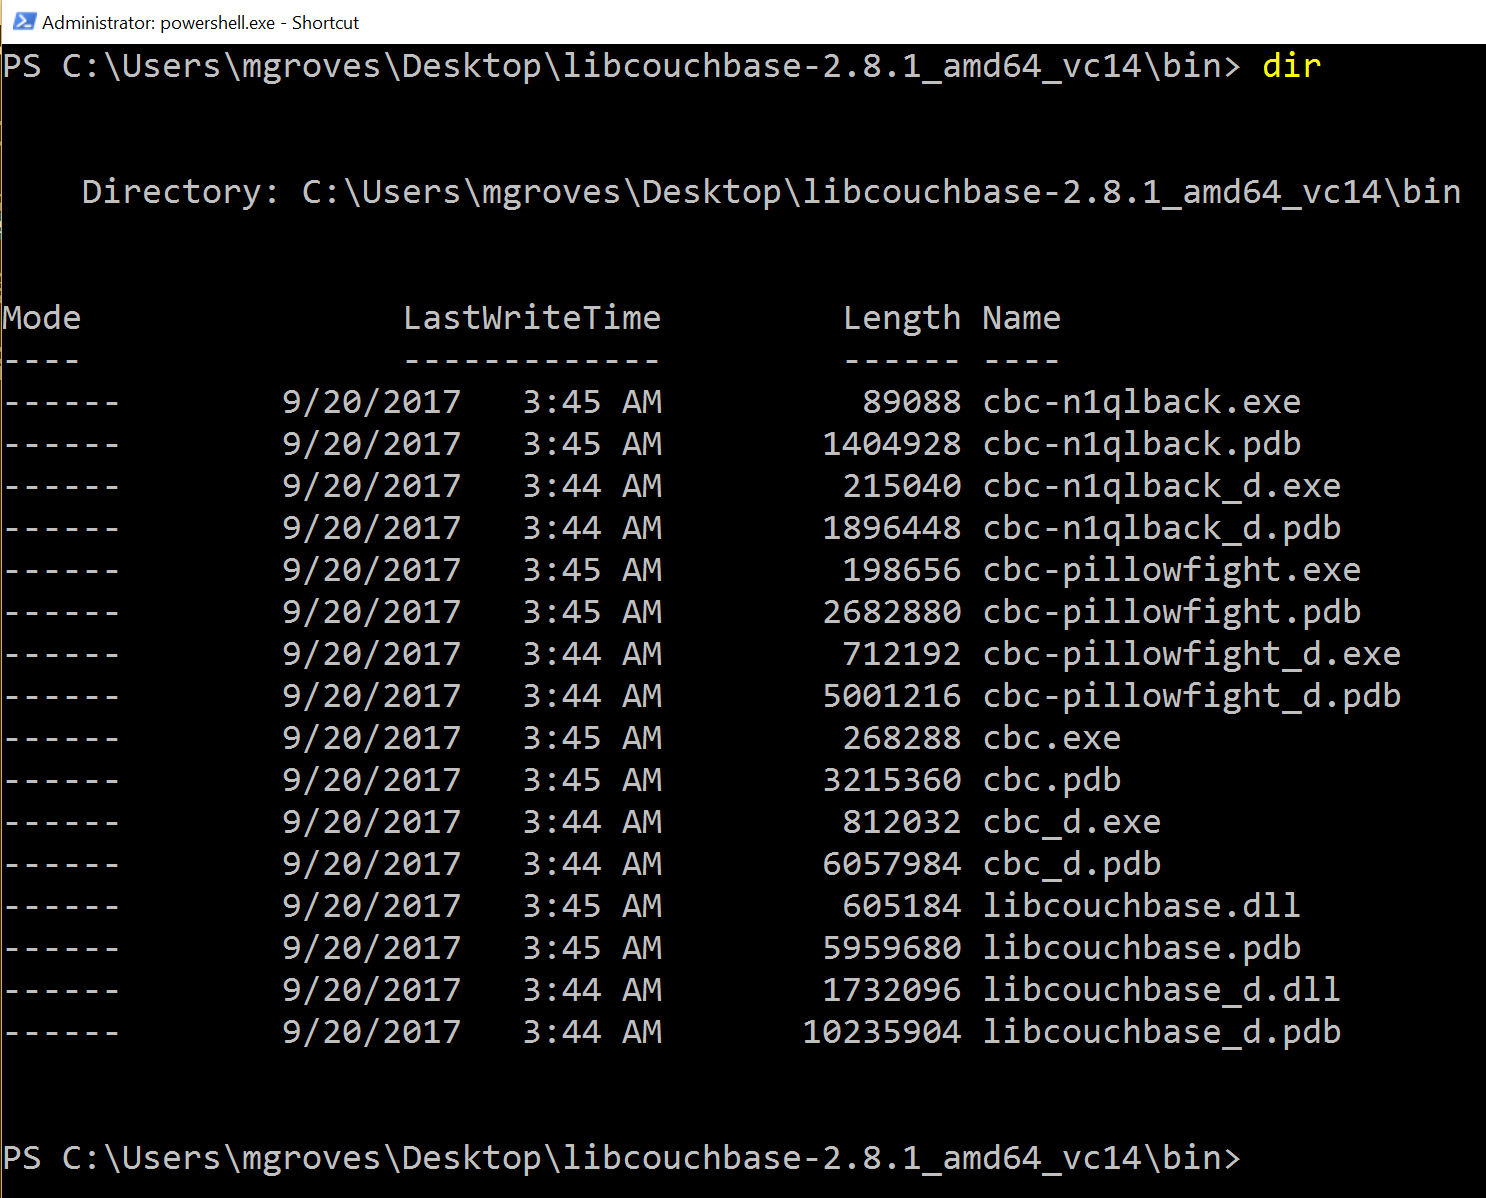
The simplest pillowfight you can run is:
.\cbc-pillowfight.exe -U couchbase://localhost/pillow -u Administrator -P password
This is for a Windows Powershell command line, but it will be very similar on other OSes.
A pillow fight will start for the cluster running on your local machine (localhost), with the "Administrator" user that has a password of "password" (your username and password may be different).
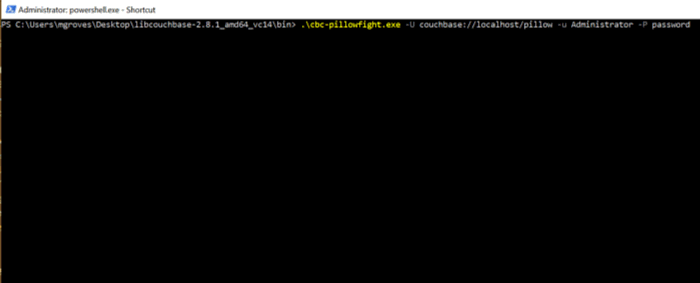
You should see a message like "Thread 0 has finished populating".
What is a pillow fight?
At this point, the pillowfight is going to start creating, updating, and reading documents from the "pillow" bucket. It’s going to do all these operations ("ops") according to the command line settings you specify (or fall back to the defaults).
For instance, with the -I flag, you can specify how many total documents you want to operate on. The default is 1000. So, if you run the above command, you will soon see 1000 documents show up in the pillow bucket.
It doesn’t just create 1000 documents and quit. Pillowfight will keep "getting" and "updating" those documents until you terminate the process. It’s called a "pillowfight" because it will put your Couchbase Cluster into battle (with actual exertion), but it’s really more of a battle simulation.
While the fight is happening, you can monitor bucket statistics to see how your cluster is performing under load.
As I type this, the fan on my laptop is whirring to life as I stress test the single node Couchbase cluster that I’ve installed on it. (I suspect my home desktop would create a much more impressive set of charts, but I am traveling a lot this month).
There are a lot of statistics available for you to look at on a bucket level. Check out the Couchbase Server documentation on Monitoring Statistics for more details.
Options for performance testing
The default pillowfight settings may not be optimal for the type of application that you’ll be using with Couchbase. There are many ways to adjust your pillow fight to make it better fit your use cases. For the full list of options, type cbc-pillowfight --help at the command line.
But here are some notable options you might want to try out:
-
-Ior--num-itemswith a number, to specify how many documents you want to operate on. -
--jsonto use JSON payloads in the documents. By default, documents are created with non-JSON payloads, but you may want to have real JSON documents in order to test other aspects of performance while the pillow fight is running. -
-eto expire documents after a certain period of time. If you are using Couchbase as a cache or short term storage, you will want to use this setting to monitor the effect of documents expiring. -
--subdocto use the subdocument API. Not every operation will need to be on an entire document. -
-Mor--max-sizeto set a ceiling on the size of the documents. You may want to adjust this to tailor a more realistic document size for your system. There’s a corresponding-mand--min-sizetoo.
Here’s another example using the above options:
.\cbc-pillowfight.exe -U couchbase://localhost/pillow -u Administrator -P password -I 10000 --json -e 10 --subdoc -M 1024
This will start a pillowfight using 10000 JSON documents, that expire after 10 seconds, uses the sub-document API, and has a max document size of 1024 bytes.
Note: there is a -t --num-threads option. Currently, if you're using Windows (like me), you are limited to a single thread (see this code).
Summary
Couchbase is committed to performance. We do extensive performance testing to make sure that we are delivering the speed you expect. Check out recent blog posts on our Plasma storage engine and N1QL enhancements. But no one knows your use case and infrastructure better than you. With pillowfight, you have a tool to help you do performance testing, load testing, and stress testing.
Thanks go out to Sergey Avseyev for helping with this blog post, and his contributions to libcouchbase.
Please reach out with questions on Couchbase by leaving a comment below or finding me on Twitter @mgroves.
This is a repost that originally appeared on the Couchbase Blog: Distributed session with ASP.NET Core and Couchbase.
Distributed session is a way for you to store your session state outside of your ASP.NET Core application. Using Couchbase to store session state can help you when you need to scale your web site, especially if you don’t want to use sticky sessions.
You can follow along with the code samples I’ve created, available on GitHub.
Note that Couchbase.Extensions.Session is a beta release at the time of this writing.
Review of session
Session state is simply a way to store data for a particular user. Typically, a token is stored in a user cookie, and that token acts as a key to some set of data on the server side.
If you’re familiar with ASP.NET or ASP Classic, this is done using Session. All the cookie work is done behind the scenes, so you simply use Session as a dictionary to store and retrieve whatever data you want.
By default, in ASP.NET and ASP Classic, this information is stored in memory, as part of the web application process.
In ASP.NET Core, you can also opt-in to this by configuring session with AddSession.
First, in Startup.cs, in the Configure function, tell ASP.NET Core to use session:
app.UseSession();Then, in the ConfigureServices function, use AddSession to add a session provider service.
services.AddDistributedMemoryCache();
services.AddSession();
(This will use the default session settings, see the ASP.NET Core documentation for more information).
Why distributed session?
However, if you are scaling out your web application with multiple web servers, you’ll have to make some decisions about session. If you continue to use in-process session, then you must configure sticky sessions (the first web server that a user hits is the one they will "stick" with for subsequent requests). This has some potential downsides (see this thread on ServerFault and this article on Microsoft’s TechNet magazine).
If you don’t want to use sticky sessions, then you can’t use the in-process session option. You’ll instead need to use a distributed session. There are a lot of options for where to put session data, but Couchbase’s memory-first architecture and flexible scaling capabilities make it a good choice.
Using distributed session in ASP.NET Core
Before you start writing code, you’ll need a Couchbase Server cluster running with a bucket (I named mine "sessionstore"). You’ll also need to create a user with Data Reader and Data Writer permission on the bucket (I also called my user "sessionstore" just to keep things simple).
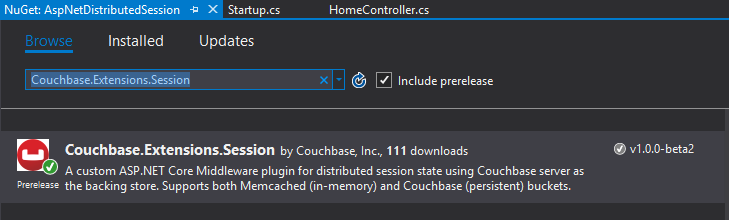
Adding Couchbase.Extensions.Session
Now, open up your ASP.NET Core application in Visual Studio. (I created a new ASP.NET Core MVC app, which you can find on GitHub). Next, with NuGet, install the Couchbase.Extensions.Session library:
-
Use the NuGet UI (see below), or
-
Install-Package Couchbase.Extensions.Session -Version 1.0.0-beta2with the Package manager, or -
dotnet add package Couchbase.Extensions.Session --version 1.0.0-beta2with the dotnet command line
Configuring Couchbase
To configure the session provider, you’ll be writing some code that looks familiar if you’ve been following along in this Couchbase.Extensions series.
The ConfigureServices method in Startup.cs is where you’ll be adding configuration code.
First, use AddCouchbase, which is done with the Dependency Injection extension.
After that, setup the distributed cache for Couchbase with AddDistributedCouchbaseCache, which I covered in a blog post on distributed caching.
services.AddCouchbase(opt =>
{
    opt.Servers = new List<Uri> { new Uri("http://localhost:8091") };
});

services.AddDistributedCouchbaseCache("sessionstore", "password", opt => { });
Finally, configure Couchbase as a session store with AddCouchbaseSession.
services.AddCouchbaseSession(opt =>
{
    opt.CookieName = ".MyApp.Cookie";
    opt.IdleTimeout = new TimeSpan(0, 0, 20, 0);
});
You can configure the idle timeout (how long until the session expires after not being used), the cookie name, and more, if you need to. In the above example, I set the timeout to 20 minutes and the cookie name to ".MyApp.Cookie".
Writing to a distributed session
To access Session data, you can use HttpContext.Session.
First, I want to write something to session. In an About controller action, I used the SetObject method:
public IActionResult About()
{
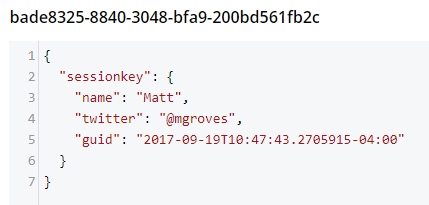
HttpContext.Session.SetObject("sessionkey", new
{
Name = "Matt",
Twitter = "@mgroves",
Guid = DateTime.Now
});
ViewData["Message"] = "I put a value in your session. Click 'Contact' to see it.";
return View();
}From this point on, whenever you click to view the "About" page, a new value will be stored in session with the key "sessionkey". If you switch over to Couchbase Console, you can see the data being stored.
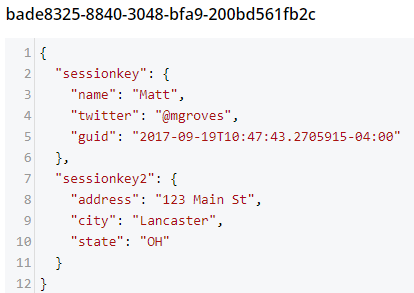
Note that a user’s session is represented by a single document. So, if I were to insert another session value (as below), that value would be stored in the same document.
HttpContext.Session.SetObject("sessionkey2", new
{
    Address = "123 Main St",
    City = "Lancaster",
    State = "OH"
});
The resultant document would look like:
You should be careful not to go crazy with the amount of data you put into session, because Couchbase documents are limited to 20mb.
Reading from a distributed session
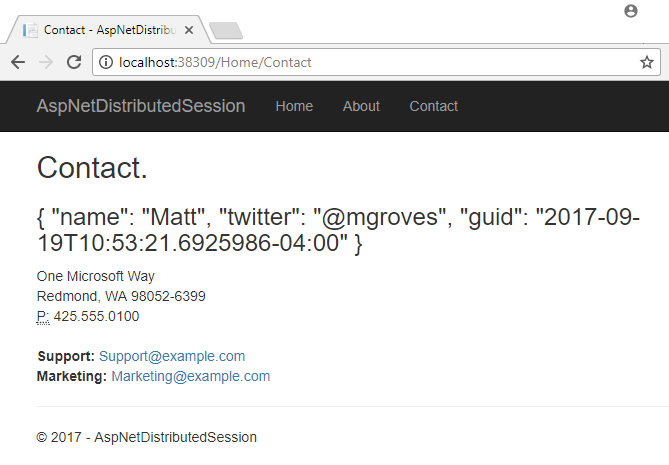
To get a value out of session, you can use GetObject and supply the session key. In the sample code, I did this in the Contact action:
public IActionResult Contact()
{
    ViewData["Message"] = HttpContext.Session.GetObject<dynamic>("sessionkey");

    return View();
}
After you visit the "About" page at least once, go to the "Contact" page. You should see the session object printed out to the page.
That’s pretty much it. There are some other relatively self-evident methods available on Session. They are also outlined in the ASP.NET Core documentation.
One more thing: I named the cookie (".MyApp.Cookie"). You can view this cookie in the browser of your choice. In Chrome, use Ctrl+Shift+I and navigate to the "Application" tab. You will see the cookie and its value.
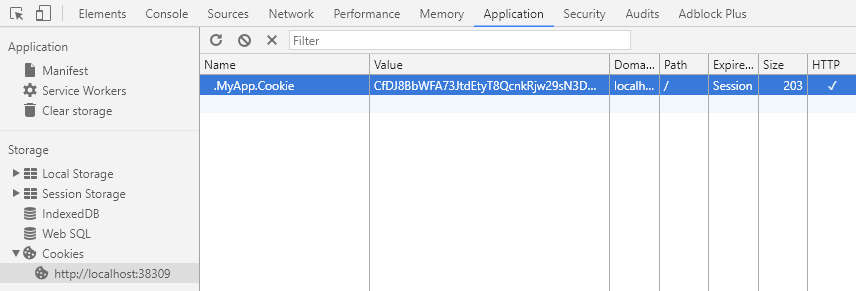
You generally don’t need to know this detail in your day-to-day as an ASP.NET Core developer, but it’s good to know how things work just in case.
Summary
The distributed session extension for Couchbase is another tool in your box for helping to scale your ASP.NET Core applications. These handy .NET extensions help to demonstrate how Couchbase is the engagement database platform that you need.
If you have questions or comments on Couchbase Extensions, make sure to check out the GitHub repository or the Couchbase .NET SDK forums.
And please reach out to me with questions on all things .NET and Couchbase by leaving a comment below or finding me on Twitter @mgroves.
This is a repost that originally appeared on the Couchbase Blog: Azure Functions and Lazy Initialization with Couchbase Server.
Azure Functions are still new to me, and I’m learning as I’m going. I blogged about my foray into Azure Functions with Couchbase over a month ago. Right after I posted that, I got some helpful feedback about the way I was instantiating a Couchbase cluster (and bucket).
I had (wrongly) assumed that there was no way to save state between Azure Function calls. This is why I created a GetCluster() method that was called each time the function ran. But, initializing a Couchbase Cluster object is an expensive operation. The less often you instantiate it, the better.
You can follow along with the updated source code for this blog post on Github.
Static state
I had a hard time finding documentation on whether I could use a static object for reuse between function calls. I suppose I should have experimented, like fellow Microsoft MVP Mark Heath did. Instead, I posed the question to StackOverflow.
In short: yes. A Cluster, instantiated and saved to a static member, can is reusable between function calls. According to Mark’s post above, there’s no guarantee how long this value will survive. But that’s an expected trade-off that you make when going "serverless".
Lazy initializing within Azure Functions
Simply using a static member would work, but it’s not thread-safe. There are a few ways to tackle that issue, but an easy way that’s built right into the .NET framework is to use Lazy Initialization with Lazy<T>.
First, I removed the GetBucket and GetCluster methods. Next, I created a Lazy<IBucket> property to replace them.
private static readonly Lazy<IBucket> Bucket = new Lazy<IBucket>(() =>
{
    var uri = ConfigurationManager.AppSettings["couchbaseUri"];
    var bucketName = ConfigurationManager.AppSettings["couchbaseBucketName"];
    var bucketPassword = ConfigurationManager.AppSettings["couchbaseBucketPassword"];
    var cluster = new Cluster(new ClientConfiguration
    {
        Servers = new List<Uri> { new Uri(uri) }
    });
    return cluster.OpenBucket(bucketName, bucketPassword);
});
I just made a single property for a bucket, since that’s all I need for this example. But if you need to use the cluster, you can easily make that its own Lazy property. (Once you have a cluster, getting a bucket is a relatively cheap operation).
Using a Lazy property
When you instantiate a Lazy<T> object, you supply it with an initialization lambda. That lambda won’t execute until the Value property is actually called for the first time.
var lazyObject = new Lazy<string>(() =>
{
    // this code won't be called until 'lazyObject.Value' is referenced
    // for the first time
    return "I'm lazy!";
});
For instance, notice the Value between Bucket and GetAsync in the updated version of my Azure Functions:
var doc = await Bucket.Value.GetAsync<MyDocument>(id);If that’s the first time Value is used, the cluster will be initialized. Otherwise, it will use the already initialized cluster (try experimenting with a Guid instead of a Bucket).
Summary
State can be saved between Azure Function calls by using a static member. Make sure that it’s thread-safe (by using Lazy<T> or something like it). Don’t make any assumptions about how long that object will be around.
Anything else I missed? Are you using Azure Functions with Couchbase? I would love to hear from you. Please leave a comment below or ping me on Twitter @mgroves.
This is a repost that originally appeared on the Couchbase Blog: Powershell with the Couchbase REST API.
PowerShell is a scripting environment / command line that comes with Windows and is also available for Linux and within Azure.
Maybe you’ve used Postman or Fiddler to make HTTP requests. Those are great, but not necessarily the right tools for automation or scripting.
You may have heard of curl before. It’s a command line tool for making HTTP requests.
If you’re a .NET/Windows developer (like me), maybe you aren’t familiar with curl. I use PowerShell as my default command line every day (though I still consider myself a PowerShell neophyte). In this post, I’ll show you how you can use PowerShell’s Invoke-WebRequest to make HTTP requests (which you can use within PowerShell scripts for automation).
You can check out the PowerShell script I created on GitHub. Note: as of the time of writing this post, I’m using PowerShell 5.1 on Windows 10.
Couchbase REST API
Couchbase Server has a an extensive REST API that you can use to manage and administrate just about every aspect of Couchbase Server. For this blog post, I’m going to focus on the Full Text Search (FTS) API. I’m going to show this because:
-
Creating an FTS index is something you’ll eventually want to automate
-
You will probably want to share an FTS index you created with your team and/or check it into source control
-
Couchbase Console already shows you exactly how to do it with curl.
I’m not going to cover FTS in detail: I invite you to check out past blog posts on FTS, and this short video demonstrating full text search.
Full Text Search review
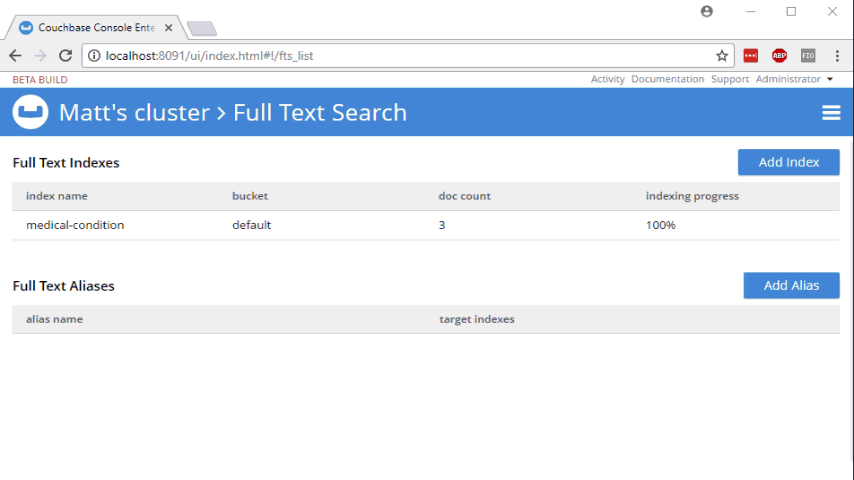
When you initially create an FTS index, you will probably use the built-in FTS UI in the Couchbase Console. This is fine when you are doing the initial development, but it’s not practical if you want to share this index with your team, automate deployment, or take advantage of source control.
Fortunately, you can use the "Show index definition JSON" feature to see the JSON data that makes up the index definition. You can also have Couchbase Console generate the curl method for you.
Well, if you’re using curl, that’s very convenient. Here’s an example:
curl -XPUT -H "Content-Type: application/json" http://localhost:8094/api/index/medical-condition -d '{ ... json payload ...}'You can copy/paste that into a script, and check the script into source control. But what if you don’t use curl?
PowerShell version: Invoke-WebRequest
First, create a new PowerShell script. I called mine createFtsIndex.ps1. All this PowerShell script is going to do is create an FTS index on an existing bucket.
You can start by pasting the "curl" command into this file. The bulk of this command is the JSON definition, which will be exactly the same.
Let’s breakdown the rest of the curl command to see what’s happening:
-
-XPUT- This is telling curl to use the PUT verb with the HTTP request -
-H "Content-Type: application/json"- Use a Content-Type header. -
http://localhost:8094/api/index/medical-condition- This is the URL of the REST endpoint. The "localhost" will vary based on where Couchbase is running, and the "medical-condition" part is just the name of the FTS index. -
-d '…json payload…'- The body of content that will be included in the HTTP request.
PowerShell’s Invoke-WebRequest can do all this stuff too, but the syntax is a bit different. Let’s step through the equivalents:
-
-Method PUT- This is telling Invoke-WebRequest to use the PUT verb with the HTTP request, so you can replace-XPUT -
-Header @{ … }- Specify headers to use with the request (more on this later) -
-Uri http://localhost:8094/api/index/medical-condition"- You just need to add "-Uri" in front -
-Body '…json payload…'- The body of content is included this way instead of using curl’s-d
Headers
PowerShell expects a "dictionary" that contains headers. The syntax for a literal dictionary in PowerShell is:
@{"key1"="value1"; "key2"="value2"}
So then, to specify Content-Type:
-Headers @{"Content-Type"="application/json"}
One thing that the curl output did not generate is the authentication information that you need to make a request to the API. With curl, you can specify basic authentication by adding the username/password to the URL. It will then translate it into the appropriate Basic Auth headers.
With PowerShell, it appears you have to do that yourself. My local Couchbase Server has credentials "Administrator" and "password" (please don’t use those in production). Those need to be encoded into Base64 and added to the headers.
Then the full Headers dictionary looks like this:
-Headers @{"Authorization" = "Basic "+[System.Convert]::ToBase64String([System.Text.Encoding]::UTF8.GetBytes("Administrator:password")); "Content-Type"="application/json"}
You might think that’s a bit noisy, and I agree. If you know a cleaner way to do this, I’m dying to know. Please leave a comment.
Execute the PowerShell script
To execute the script, simply type .\createFtsIndex.ps1 at the PowerShell command line.
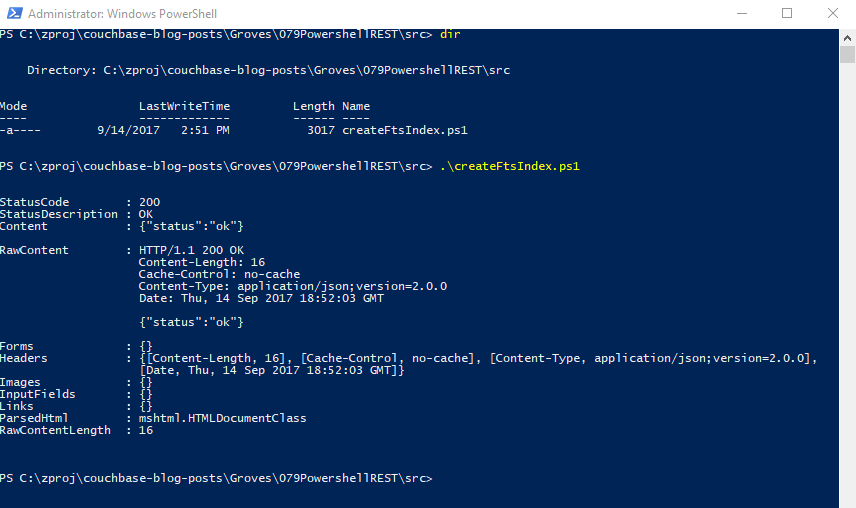
You’re now ready to make this a part of your deployment.
Summary
PowerShell is a handy tool for scripting and automation. It’s used by Azure, Octopus Deploy, and anywhere Windows is running. Use PowerShell to automate Couchbase REST API calls for things like Full Text Search indexes, and your team will thank you.
Need help? Reach out to me with questions by leaving a comment below or finding me on Twitter @mgroves.
This is a repost that originally appeared on the Couchbase Blog: Dependency Injection with ASP.NET Core and Couchbase.
Dependency Injection is a design pattern that makes coding easier. It saves you the hassle of instantiating objects with complex dependencies, and it makes it easier for you to write tests. With the Couchbase.Extensions.DependencyInjection library (GitHub), you can use Couchbase clusters and buckets within the ASP.NET Core dependency injection framework.
In my last blog post on distributed caching with ASP.NET, I mentioned the DependencyInjection library. Dependency injection will be explored in-depth in this post. Feel free to follow along with the code samples I’ve created, available on GitHub.
Basic setup of Couchbase
First, you’ll need a Couchbase Server cluster running. You can:
-
Install it on-premise
-
Run in a container with Docker
-
Use a cloud service like Azure
Next, you’ll need to create a bucket in Couchbase. This can be the "travel-sample" bucket that comes with Couchbase, or a bucket that you create yourself.
If you are using Couchbase Server 5.0, you’ll also need to create a user. Give that user Cluster Admin permission, and give it the same name as the bucket, just to keep things simple if you are following along.
Dependency Injection with Couchbase.Extensions
The Couchbase.Extensions (GitHub) project aims to make working with Couchbase Server and ASP.NET Core simpler. Dependency Injection is just one of these extensions.
You can add it to your ASP.NET Core project with NuGet:
-
By using Package Manager:
Install-Package Couchbase.Extensions.DependencyInjection -Version 1.0.2 -
With the NuGet UI
-
Use the .NET command line:
dotnet add package Couchbase.Extensions.DependencyInjection --version 1.0.2
(Version 1.0.2 is the latest version at the time of writing).

Next, you’ll need to make changes to your Startup class in Startup.cs.
In the blog post on caching, I hard-coded the configuration:
services.AddCouchbase(client =>
{
    client.Servers = new List<Uri> { new Uri("http://localhost:8091")};
    client.UseSsl = false;
});
This is fine for demos and blog posts, but you’ll likely want to use a configuration file for a production project.
services.AddCouchbase(Configuration.GetSection("Couchbase"));Assuming you’re using the default appsettings.json, update that file to add a Couchbase section:
"Couchbase" : {
  "Servers": [
    "http://localhost:8091"
  ],
  "UseSsl": false
}
By making a "Couchbase" section, the dependency injection module will read right from the appsettings.json text file.
Constructor Injection
After dependency injection is setup, you can start injecting useful objects into your classes. You might inject them into Controllers, services, or repositories.
Here’s an example of injecting into HomeController:
public class HomeController : Controller
{
    private readonly IBucket _bucket;

    public HomeController(IBucketProvider bucketProvider)
    {
        _bucket = bucketProvider.GetBucket("travel-sample", "password");
    }

    // ... snip ...
}
Next, let’s do a simple Get operation on a well-known document in "travel-sample". This token usage of the Couchbase .NET SDK will show dependency injection in action. I’ll make a change to the generated About action method. In that method, it will retrieve a route document and write out the equipment number.
public IActionResult About()
{
    // get the route document for Columbus to Chicago (United)
    var route = _bucket.Get<dynamic>("route_56027").Value;

    // display the equipment number of the route
    ViewData["Message"] = "CMH to ORD - " + route.equipment;

    return View();
}
And the result is:
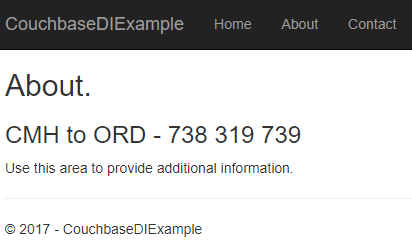
Success! Dependency injection worked, and we’re ready to use a Couchbase bucket.
If you aren’t using "travel-sample", use a key from your own bucket.
Named buckets
You can use dependency injection for a single bucket instead of having to specify the name each time.
Start by creating an interface that implements INamedBucketProvider. Leave it empty. Here’s an example:
public interface ITravelSampleBucketProvider : INamedBucketProvider
{
    // nothing goes in here!
}
Then, back in Startup.cs, map this interface to a bucket using AddCouchbaseBucket:
services
    .AddCouchbase(Configuration.GetSection("Couchbase"))
    .AddCouchbaseBucket<ITravelSampleBucketProvider>("travel-sample", "password");
Now, the ITravelSampleBucketProvider gets injected instead of the more general provider.
public HomeController(ITravelSampleBucketProvider travelBucketProvider)
{
    _bucket = travelBucketProvider.GetBucket();
}
More complex dependency injection
Until this point, we’ve only used dependency injection on Controllers. Dependency injection starts to pay dividends with more complex, deeper object graphs.
As an example, imagine a service class that uses a Couchbase bucket, but also uses an email service.
public class ComplexService : IComplexService
{
    private readonly IBucket _bucket;
    private readonly IEmailService _email;

    public ComplexService(ITravelSampleBucketProvider bucketProvider, IEmailService emailService)
    {
        _bucket = bucketProvider.GetBucket();
        _email = emailService;
    }

    public void ApproveApplication(string emailAddress)
    {
        _bucket.Upsert(emailAddress, new {emailAddress, approved = true});
        _email.SendEmail(emailAddress, "Approved", "Your application has been approved!");
    }
}
Next, let’s use this service in a controller (aka making it a dependency). But notice that the controller is not directly using either the bucket or the email service.
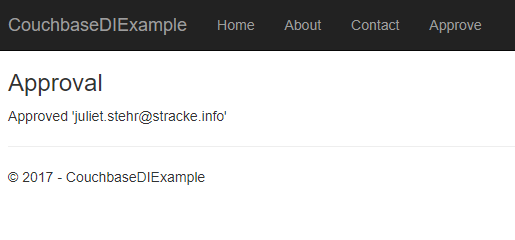
public class ApproveController : Controller
{
    private readonly IComplexService _svc;

    public ApproveController(IComplexService svc)
    {
        _svc = svc;
    }

    public IActionResult Index()
    {
        var fakeEmailAddress = Faker.Internet.Email();
        _svc.ApproveApplication(fakeEmailAddress);
        ViewData["Message"] = "Approved '" + fakeEmailAddress + "'";
        return View();
    }
}
If I were to instantiate ComplexService manually, I would have to instantiate at least two other objects. It would look something like: new ComplexService(new BucketProvider(), new MyEmailService(). That’s a lot that I have to keep track of, and if any dependencies change, it’s a lot of manual maintenance.
Instead, I can have ASP.NET Core use dependency injection to do all this for me. Back in Startup:
services.AddTransient<IEmailService, MyEmailService>();
services.AddTransient<IComplexService, ComplexService>();
Now, ASP.NET Core knows how to instantiate:
-
ITravelSampleBucketProvider, thanks to Couchbase.Extensions.DependencyInjection -
IEmailService- I told it to useMyEmailService -
IComplexService- I told it to useComplexService
Finally, when ApproveController is instantiated, ASP.NET Core will know how to do it. It will create ComplexService by instantiating MyEmailService and ComplexService. It will inject ComplexService automatically into `ApproveController’s constructor. The end result:
For the complete example, be sure to check out the source code that accompanies this blog post on GitHub.
Cleaning up
Don’t forget to clean up after yourself. When the ASP.NET Core application is stops, release any resources that the Couchbase .NET SDK is using. In the Configure method in Startup, add a parameter of type IApplicationLifetime:
public void Configure(IApplicationBuilder app, IHostingEnvironment env, ILoggerFactory loggerFactory, IApplicationLifetime applicationLifetime)Within that Configure method, setup an ApplicationStopped event:
applicationLifetime.ApplicationStopped.Register(() =>
{
    app.ApplicationServices.GetRequiredService<ICouchbaseLifetimeService>().Close();
});
Summary
Dependency injection is a rich subject. Entire books have been written about it and its benefits to your application. This blog post just scratched the surface and didn’t even cover the testability benefits.
Couchbase.Extensions.DependencyInjection makes it easier to inject Couchbase into ASP.NET Core.
If you have questions or comments, make sure to check out the GitHub repository or the Couchbase .NET SDK forums.
And please reach out to me with questions by leaving a comment below or finding me on Twitter @mgroves.
