public class ViberIncoming
{
    public string Event { get; set; }
    public long Timestamp { get; set; }
    public ViberSender Sender { get; set; }
    public ViberMessage Message { get; set; }
}

public class ViberSender
{
    public string Id { get; set; }
    public string Name { get; set; }
}

public class ViberMessage
{
    public string Text { get; set; }
    public string Type { get; set; }
}Posts tagged with 'Couchbase Server'
This is a repost that originally appeared on the Couchbase Blog: Test Drive: Trying Couchbase on Azure for Free.
Test Drive is an Azure feature that allows you to try out software in the cloud for free.
Previously, I wrote about how Getting started with Couchbase on Azure is easy and free. That post told you how to get started with $200 in Azure credit. With Test Drive, however, it’s even easier to get started, and you don’t have to use any of that $200 credit.
Test Drive on Azure Marketplace
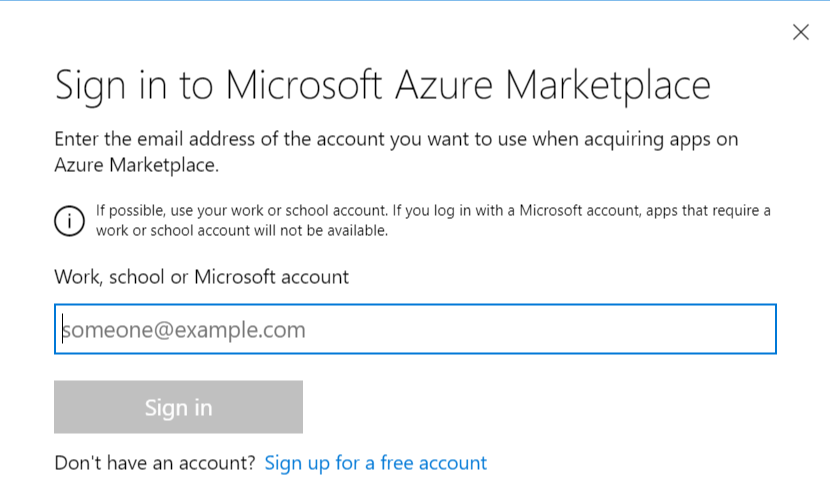
The only thing you need before you start is a Microsoft account, which is free.
Start by going to the Couchbase Enterprise product page on Azure.
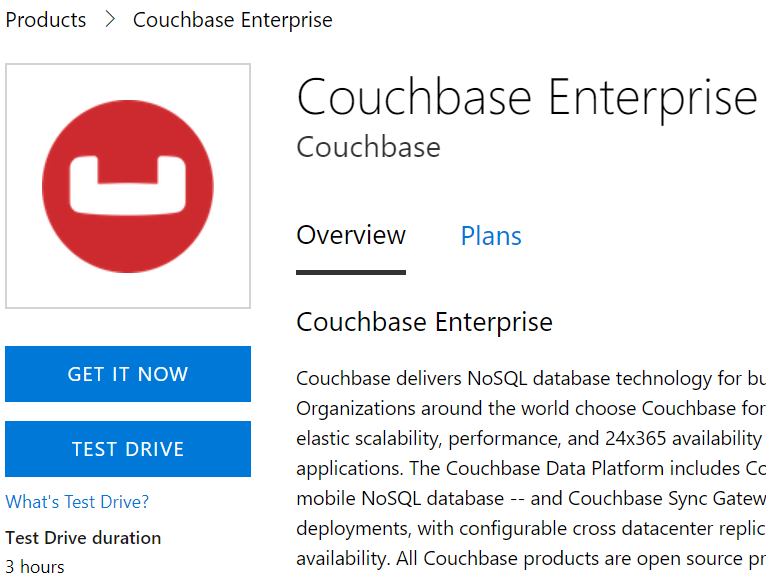
There’s a big "Test Drive" button. Simply click to get started.
Before you click to get started, notice that the Test Drive has a limited duration. You will get 3 hours to evaluate Couchbase Server.
Step by Step Evaluation Labs
We’ve prepared 4 step-by-step labs that you can follow to start evaluating Couchbase Server.
The test drive deployment is a fully functional Couchbase Server Enterprise cluster with all features enabled. The only limit you have is time.
Summary
Couchbase is proud to partner with Microsoft to make this test drive available to you.
If you are interested in learning more about Couchbase on Azure, please check out these other blog posts:
If you have any questions, comments, or suggestions, please leave a comment, email me [email protected], or tweet me @mgroves on Twitter.
This is a repost that originally appeared on the Couchbase Blog: Scaling Couchbase Server on Azure.
Scaling is one of Couchbase Server’s strengths. It’s easy to scale, and Couchbase’s architecture makes an efficient use of your scaling resources. In fact, when Couchbase customer Viber switched from Mongo to Couchbase, they cut the number of servers they needed in half.
This blog post is the third in a (loose) series of posts on Azure.
The first post showed you the benefits of serverless computing on Azure with Couchbase.
The second post showed a concrete example of creating a chatbot using Azure functions and Couchbase Server.
The previous post only used a cluster with a single node for demonstration purposes. Now suppose you’ve been in production for a while, and your chatbot is starting to get really popular. You need to scale up your Couchbase cluster. If you deployed Couchbase from the Azure Marketplace, this is a piece of cake. Long story short: you pretty much just move a slider. But this post will take you all the way through the details:
-
Creating a brand new cluster with 3 nodes.
-
Scaling the cluster up to 5 nodes.
-
Scaling the cluster down to 4 nodes.
Create Couchbase Cluster on Azure
Assuming you have an Azure account, login to the portal. If you don’t yet, Getting Started with Azure is Easy and Free.
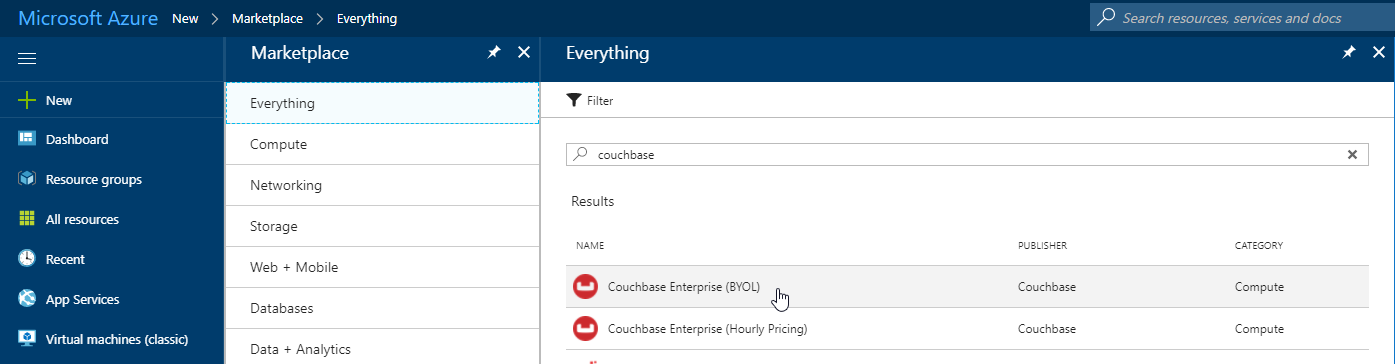
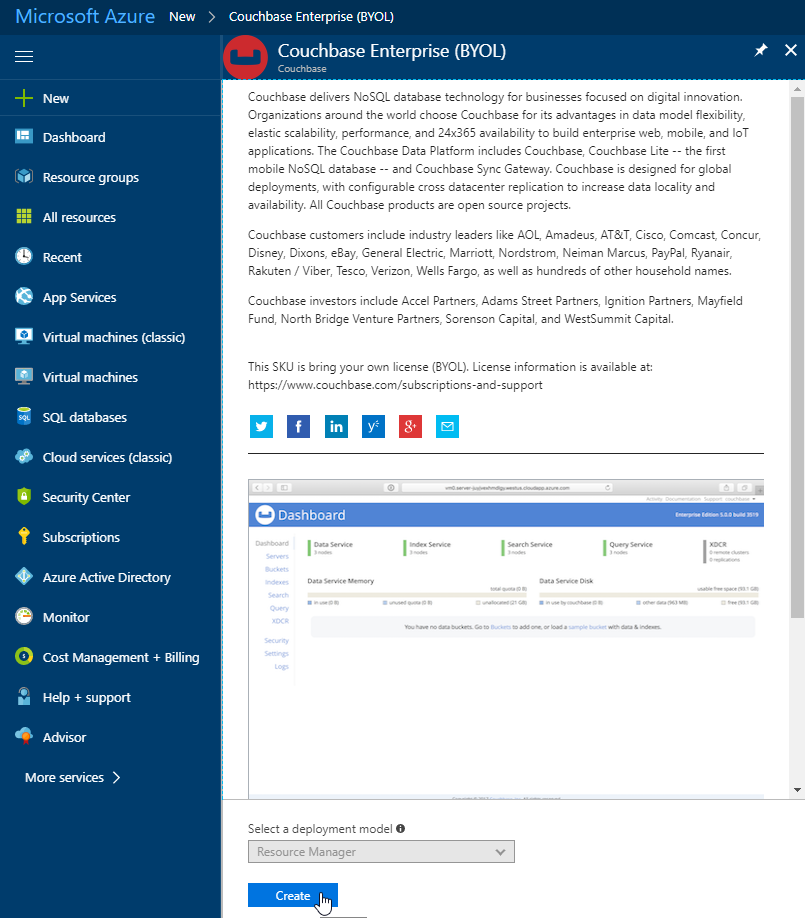
Once you’re logged in, click "+ New" and search for Couchbase Server in the marketplace. I’m using BYOL (bring your own license) for demonstration, but there is also an "Hourly Pricing" option that comes with silver support.
Once you select Couchbase, you’ll be taken through an Azure installation wizard. Click the "Create" button to get started.
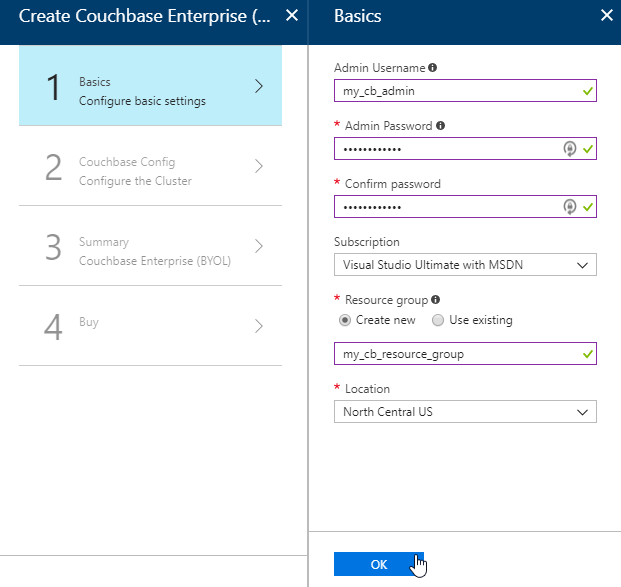
Step 1 is the "Basics". Fill out the username and password you want for Couchbase, the name of a resource group, and a location (I chose North Central US because it is close to me geographically). Make sure to make a note of this information, as you’ll need it later.
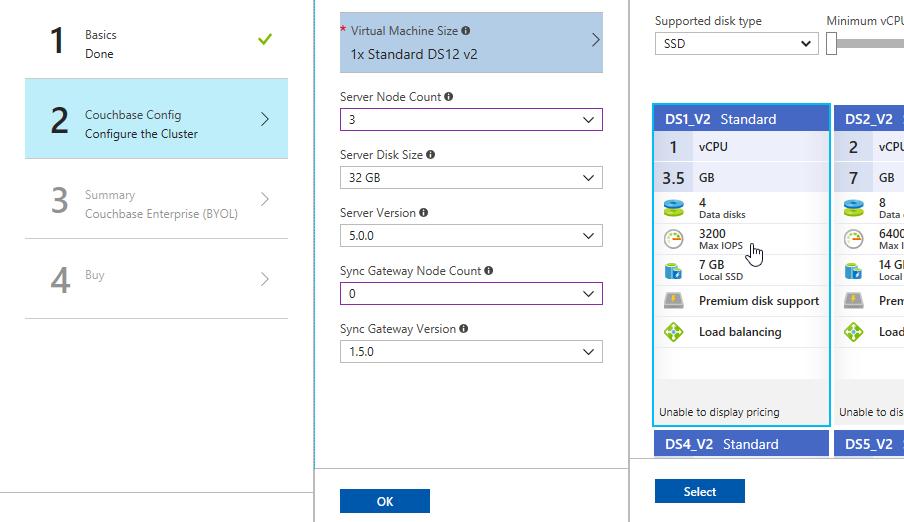
The next step is Couchbase Config. There are some recommended VM types to use. I went with DS1_V2 to keep this blog post cheap, but you probably want at least 4 cores and 4gb of RAM for your production environment. I also elected not to install any Sync Gateway Nodes, but if you plan to use Couchbase Mobile, you will need these too. I’m asking for a total of 3 nodes for Couchbase Server.
After this, step 3 is just a summary of the information you’ve entered.
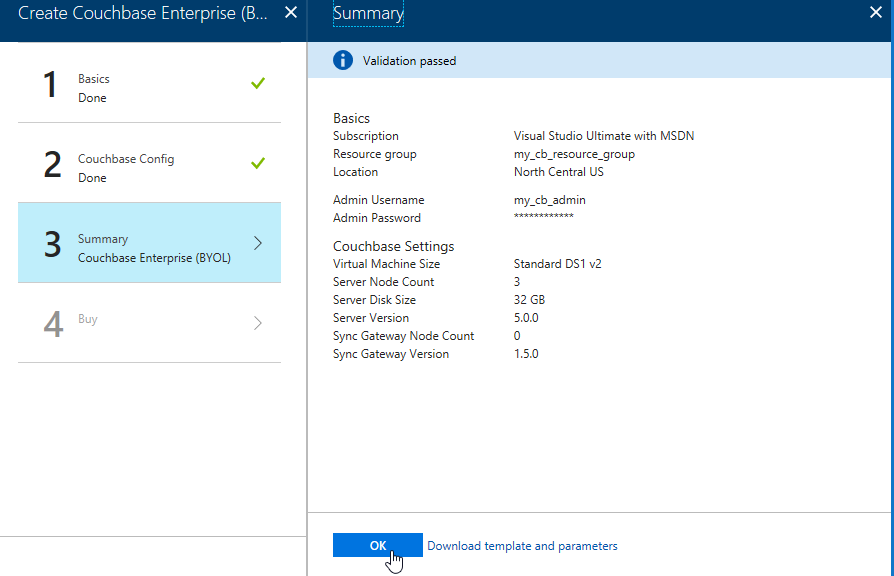
The last step is "buy". This shows you the terms. One "Create" button is all that remains.
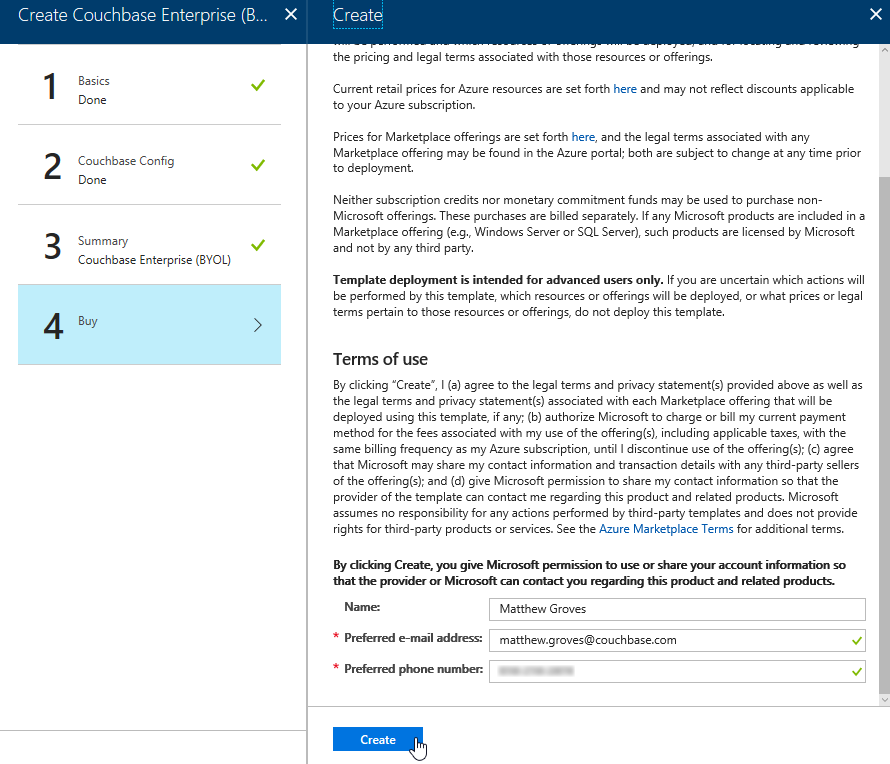
Now, Azure will go to work provisioning 3 VMs, installing Couchbase Server on them, and then creating a cluster. This will take a little bit of time. You’ll get an Azure notification when it’s done.
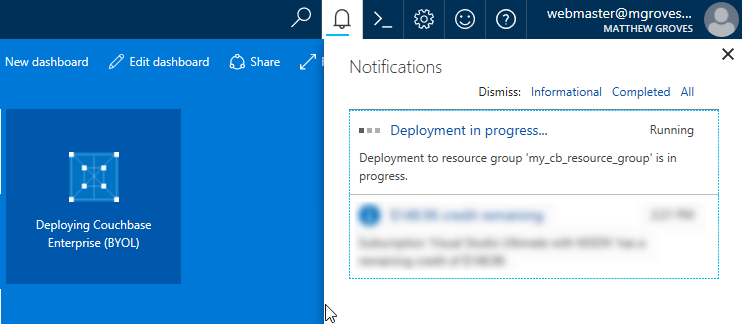
You should have just enough time to get yourself a nice beverage.
Using your Couchbase Cluster
When Azure finishes with deployment, go look at "Resource groups" in the Azure portal. Find your resource group. Mine was called my_cb_resource_group.
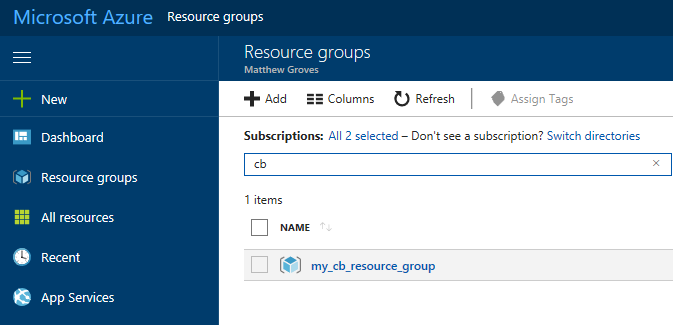
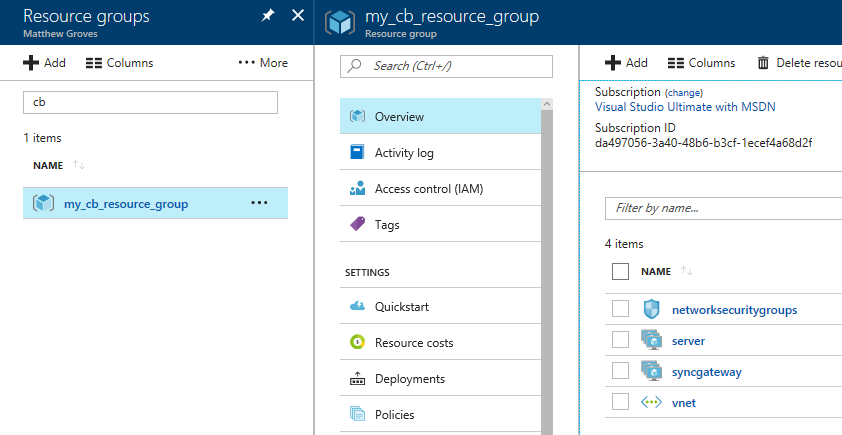
Click on the resource group. Inside that resource group, you’ll see 4 things:
-
networksecuritygroups (these are firewall rules, essentially)
-
vnet (the network that all the resources in the group are on)
-
server (Couchbase Server instances)
-
syncgateway (Couchbase Sync Gateway instances. I didn’t ask for any, so this is an empty grouping)
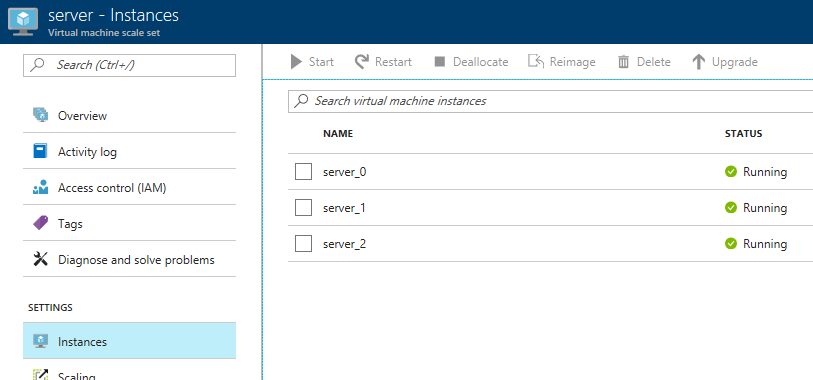
First, click 'server', and then 'instances'. You should see 3 servers (or however many you provisioned).
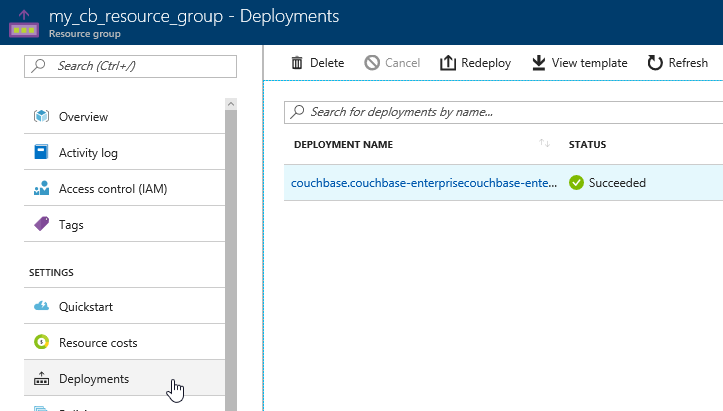
Next, click 'deployments'. You should see one for Couchbase listed. Click it for more information about the deployment.
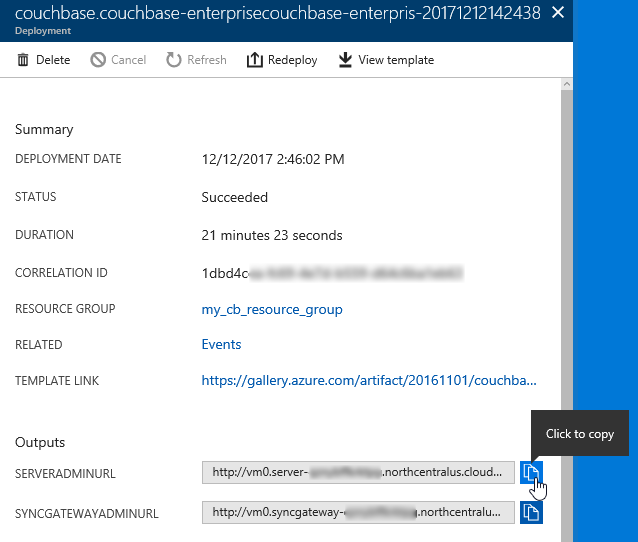
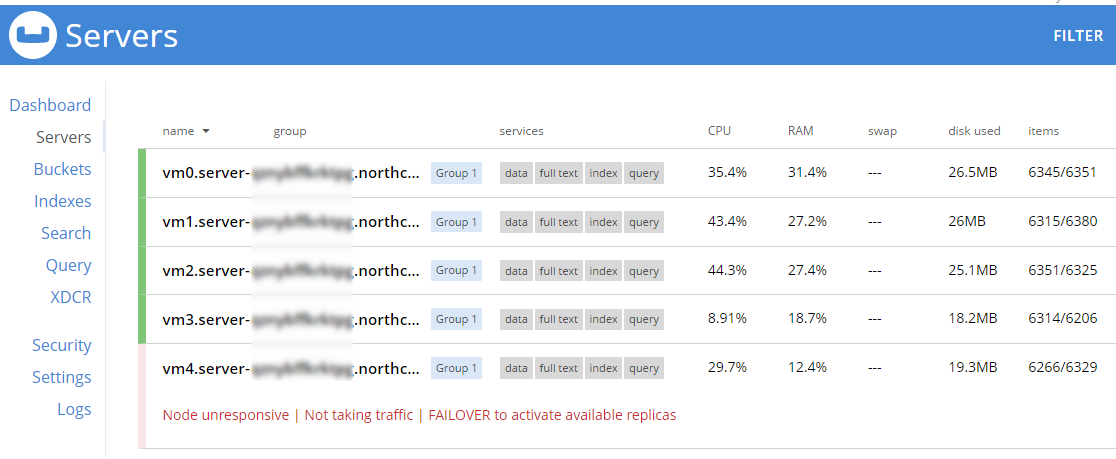
The next screen will tell you the URL that you need to get to the Couchbase Server UI (and Sync Gateway UI if you installed that). It should look something like: http://vm0.server-foobarbazqux.northcentralus.cloudapp.azure.com:8091.
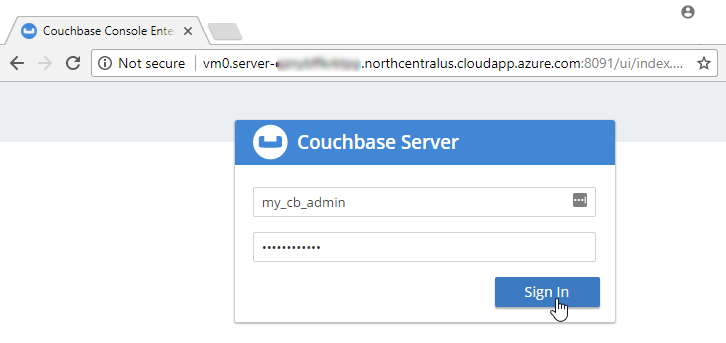
Paste that URL into a browser. You will be taken to the Couchbase Server login screen. Use the credentials you specified earlier to login.
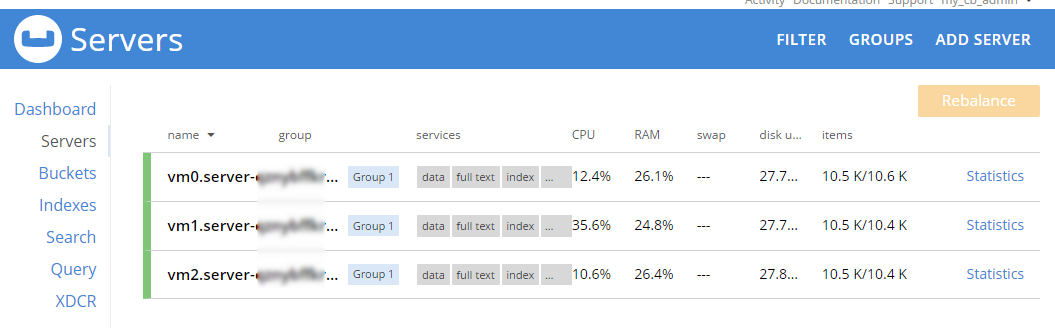
After you login, click on 'servers'. You will see the three servers listed here. The URLs will match the deployments you see in the Azure portal.
Let’s put some data in this database! Go to Settings → Sample Buckets and load the 'travel-sample' bucket.
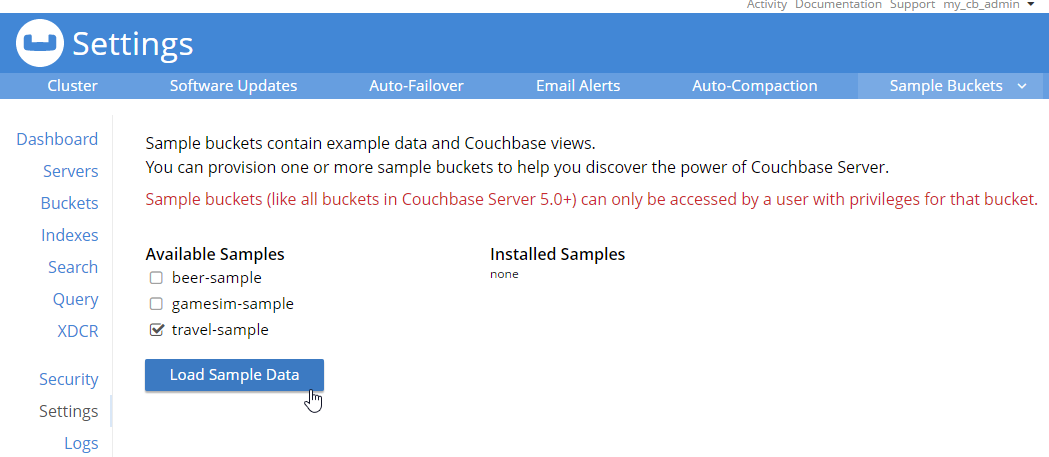
This sample data contains 31591 documents. When it’s done loading, go back to "servers". You can see how the 'items' (and replica items) are evenly distributed amongst the three servers. Each node in Couchbase can do both reads and writes, so this is not a master/slave or a read-only replica sets situation.
Scaling up
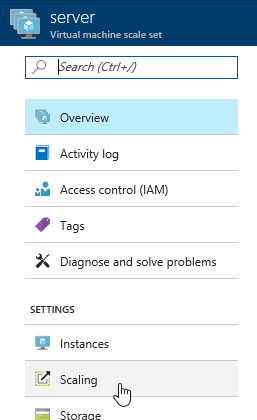
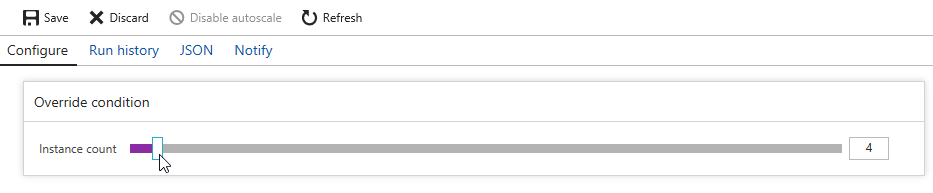
Now, let’s suppose your application is really taking off, and you need to scale up to provide additional capacity, storage, performance. Since we’re using Couchbase deployed from the Azure marketplace, this is even easier than usual. Go to the Azure portal, back to the resource group, and click "server" again. Now click "scaling"
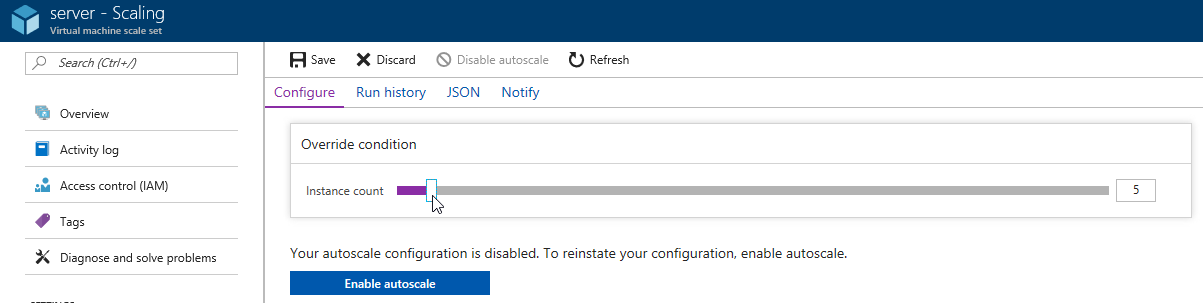
Next, you will see a slider that you can adjust to add more instances. Let’s bump it up to 5 total servers. Make sure to click "save".
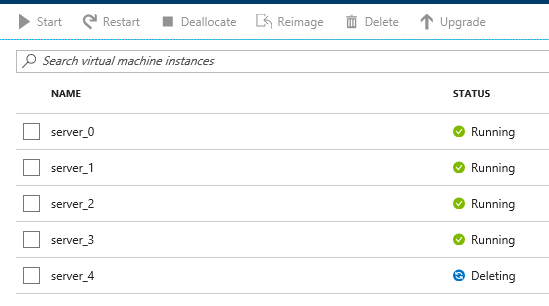
Now, go back to 'instances' again. Note: you may have to refresh the page. Azure doesn’t seem to want to update the stale page served to the browser on its own. You will now see server_3 and server_4 in "creating" status.
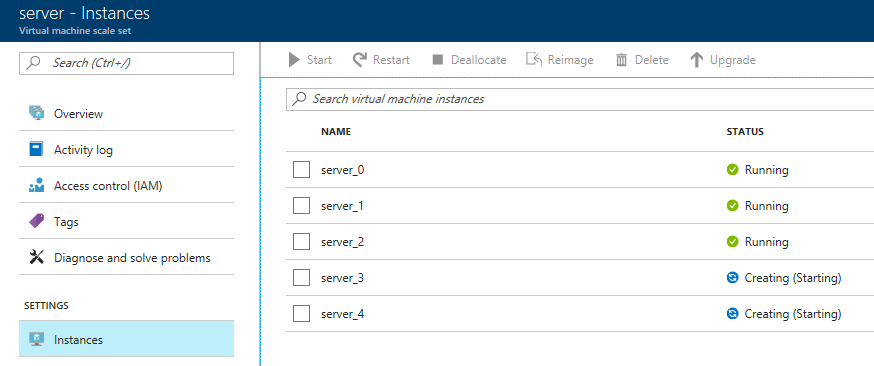
You will need to wait for these to be deployed by Azure. In the meantime, you can go back over to the Couchbase Server UI and wait for them to appear there as well.
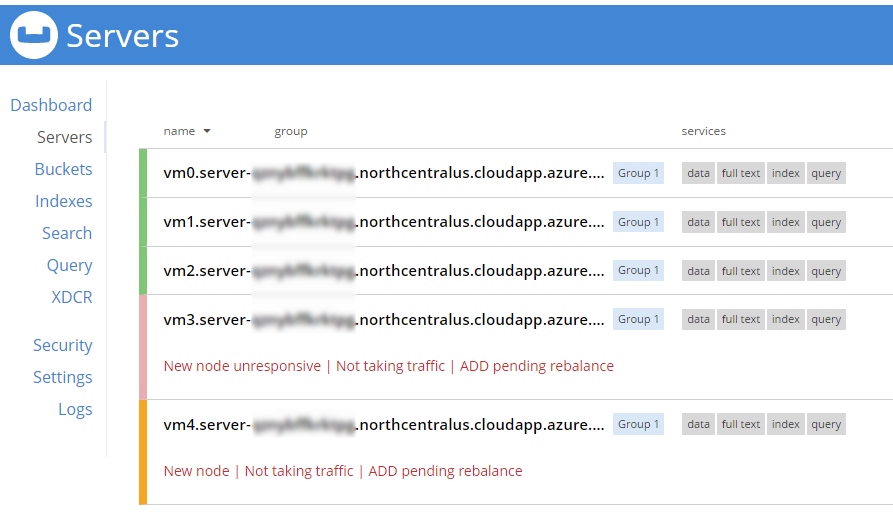
When adding new servers, the cluster must be rebalanced. The Azure deployment should attempt to do this automatically (but just in case it fails, you can trigger the rebalance manually too).
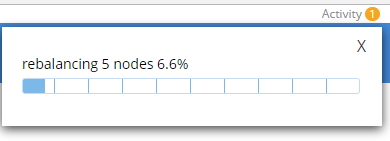
During this rebalance period, the cluster is still accessible from your applications. There will be no downtime. After the rebalance is over, you can see that the # of items on each server has changed. It’s been redistributed (along with replicas).
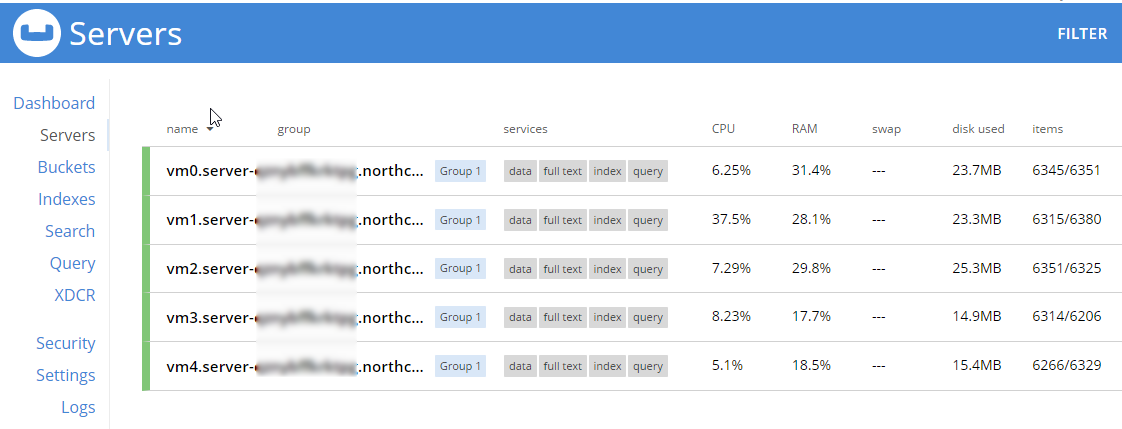
That’s it. It’s pretty much just moving a slider and waiting a few minutes.
Scaling Down
At some point, you may want to scale down your cluster. Perhaps you need 5 servers during a certain part of the year, but you only need 3 for other parts, and you’d like to save some money on your Azure bill.
Once again, this is just a matter of adjusting the slider. However, it’s a good idea to scale down one server at a time to avoid any risk of data loss.
When you scale down, Azure will pick a VM to decommission. Couchbase Server can respond in one of two ways:
-
Default behavior is to simply indicate that a node is down. This could trigger an email alert. It will show as 'down' in the UI.
-
Auto-failover can be turned on. This means that once a node is down, the Couchbase cluster will automatically consider it 'failed', promote the replicas on other nodes, and rebalance the cluster.
I’m going to leave auto-failover off and show the default behavior.
First, the server will show a status of 'deleting' in the Azure portal.
Soon after, Couchbase will recognize that a node is not responsive. It will suggest failover to 'activate available replicas'.
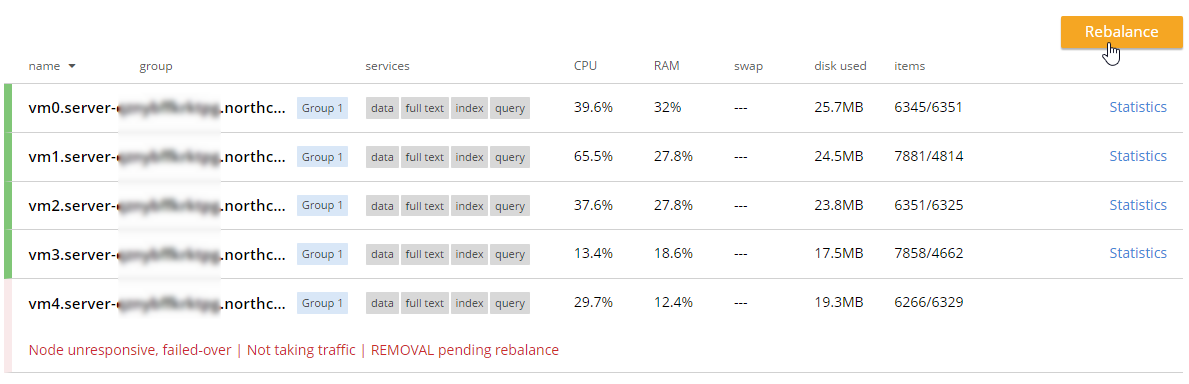
I’ll go ahead and do just that.

Once it’s removed from the cluster, you’ll need to trigger a 'rebalance'.
Summary and resources
Scaling a Couchbase cluster on Azure is simply a matter of using the slider.
If you’re scaling down, consider doing it one node at a time.
For more information, check out these resources:
-
A video by Ben Lackey covering the scaling process of Couchbase on Azure.
-
Make sure to read up on Auto-failover in the documentation.
-
Also check out the documentation on rebalancing.
If you have questions, please contact me on Twitter @mgroves or leave a comment.
This is a repost that originally appeared on the Couchbase Blog: Chatbot on Azure and Couchbase for Viber.
A chatbot can be a novel way to interact with users. After writing a post introducing the basics of serverless, and also writing a post on writing Azure Functions, I decided I would try to build something a little more practical than a "hello, world".
Using a serverless architecture for a chatbot makes sense. Chatbot usage may be sporadic. Usage may peak and drop at various times of the day. By using serverless, you’ll only be paying for the resources and time that you need.
If you want to follow along, all the source code for this blog post is available on Github.
Viber Chatbot
I could have chosen a lot of different platforms to create a chatbot for: Facebook Messenger, Skype, WhatsApp, and more. But I decided to go with Viber.
In the United States, Viber doesn’t seem to have a huge following, but I’ve been using it a lot. It’s a very handy way to chat with my wife, send pictures, funny GIFs, and so on. I find it to be more reliable and faster than SMS, especially for pictures. I wish everyone in my family was using it! It’s also a nice side effect that Viber is a Couchbase customer. They switched from MongoDb to support their growing data needs.
Also, Viber’s REST API is simple and well documented. Between the use of serverless architecture and Viber’s API, I couldn’t believe how fast I went from 0 to chatbot.
Setup
First, You’ll need to start by creating a bot in Viber (you’ll need a Viber account at some point). Viber will give you an API key that looks something like 30a6470a1c67d66f-4207550bd0f024fa-c4cacb89afc04094. You’ll use this in the HTTP headers to authenticate to the Viber API.
Next, create a new Azure Functions solution. I’ve previously blogged about Azure Functions with a followup on Lazy Initialization.
I decided to use C# to write my Azure Functions. Unfortunately, there is no .NET SDK for Viber (as far as I know), so I’ll have to use the REST API directly. Not a big deal, I just used RestSharp. But if you prefer NodeJS or Python, Viber has got you covered with SDKs for those languages.
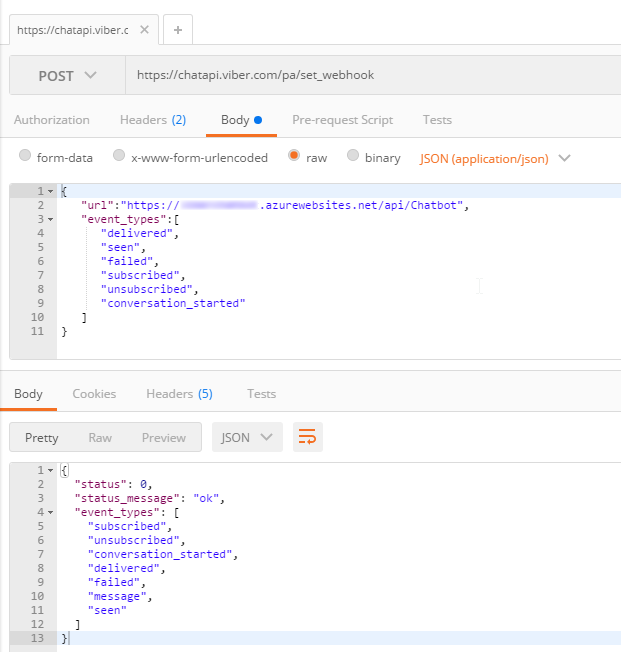
Before you start coding, you’ll need to setup a Webhook. This is simply a way of telling Viber where to send incoming messages. You’ll only need to do this at the beginning. I did this by first deploying a barebones Azure Function that returns a 200. I used Postman to set the initial webhook.
Finally, I setup a Couchbase cluster on Azure. Getting started with Couchbase and Azure is easy and free. (You can even use the "Test Drive" button to get 3 hours of Couchbase Server without expending any Azure credit). I created a single user called "viberchatbot", a bucket called "ViberChatBot", and I loaded the "travel-sample" bucket.
Azure Function
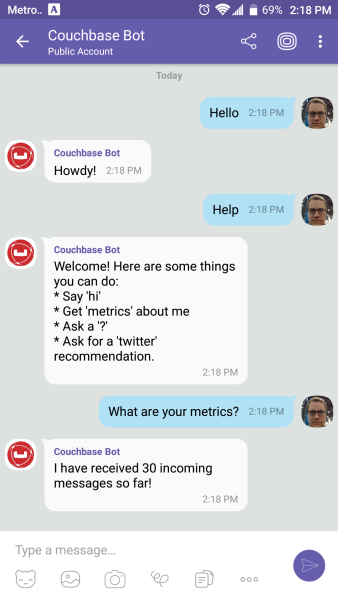
For this application, I wanted to create a chatbot with a little more substance than "Hello, world" and I also wanted to have a little fun. Here are the commands I want my chatbot to understand:
-
If I say "hi" (or hello, etc), it will respond with "Howdy!"
-
If I ask for "metrics", it will tell me how many messages it’s processed so far.
-
If I mention "twitter", it will make a recommendation about who to follow.
-
If I ask for flights from CMH to ATL (or other airports) it will tell me how many flights there are today (I will use the travel-sample bucket for this data).
-
If I say "help", it will give me a list of the above commands.
I decided not to use any natural language processing or parsing libraries. I’m just going to use simple if/else statements and some basic string matching. If you are planning to create a robust chatbot with rich capabilities, I definitely recommend checking out libraries and tools like LUIS, wit.ai, NLTK and others.
Chatbot code
I started by creating a few C# classes to represent the structure of the data that Viber will be sending to my serverless endpoint.
Viber classes
This is not an exhaustive representation of Viber’s capabilities by far, but it’s enough to start receiving basic text messages.
Next, the Azure function will convert the raw HTTP request into a ViberIncoming object.
[FunctionName("Chatbot")]
public static async Task<HttpResponseMessage> Run(
    [HttpTrigger(AuthorizationLevel.Anonymous, "get", "post", Route = null)]HttpRequestMessage req,
    TraceWriter log)
{
    var incoming = req.Content.ReadAsAsync<ViberIncoming>().Result;

    var viber = new ViberProcessor(Bucket.Value);
    viber.Process(incoming);

    // return "OK" each time
    // this is most important for the initial Viber webhook setup
    return req.CreateResponse(HttpStatusCode.OK);
}
After this, I created a ViberProcessor class with a Process method that receives this object.
public void Process(ViberIncoming incoming)
{
    if (incoming?.Message?.Type == "text")
    {
        LogIncoming(incoming);
        ProcessMessage(incoming);
    }
}
Processing Viber messages
LogIncoming creates a record (in Couchbase) so that I know everything about each request that comes in.
ProcessMessage will analyze the text of the message and figure out what to do in response. You can check out the complete code on Github, but here’s a brief snippet to give you the idea:
// if the message contains "hi", "hello", etc say "howdy"
else if (HelloStrings.Any(incoming.Message.Text.ToLower().Contains))
    SendTextMessage("Howdy!", incoming.Sender.Id);
// if message contains "?" then link to the forums
else if (incoming.Message.Text.Contains("?"))
    SendTextMessage("If you have a Couchbase question, please ask on the forums! http://forums.couchbase.com", incoming.Sender.Id);
else
    SendTextMessage("I'm sorry, I don't understand you. Type 'help' for help!", incoming.Sender.Id);
Getting metrics
One of things my chatbot listens for is "metrics". When you ask it for metrics, it will give you a count of the incoming messages that it’s processed. Since I’m logging every request to Couchbase, querying for metrics is easily done with a N1QL query.
private string GetMetrics()
{
    var n1ql = @"select value count(*) as totalIncoming
                from ViberChatBot b
                where meta(b).id like 'incoming::%';";
    var query = QueryRequest.Create(n1ql);
    var response = _bucket.Query<int>(query);
    if (response.Success)
        return $"I have received {response.Rows.First()} incoming messages so far!";
    return "Sorry, I'm having trouble getting metrics right now.";
}
Sending a message back
The chatbot needs to communicate back to the person who’s talking to it. As I said earlier, there is no Viber .NET SDK, so I have to create a REST call "manually". This is easy enough with RestSharp:
private void SendTextMessage(string message, string senderId)
{
    var client = new RestClient("https://chatapi.viber.com/pa/send_message");
    var request = new RestRequest(RestSharp.Method.POST);
    request.AddJsonBody(new
    {
        receiver = senderId,    // receiver	(Unique Viber user id, required)
        type = "text",          // type	(Message type, required) Available message types: text, picture, etc
        text = message
    });
    request.AddHeader("X-Viber-Auth-Token", ViberKey);
    var response = client.Execute(request);

    // log to Couchbase
    _bucket.Insert("resp::" + Guid.NewGuid(), response.Content);
}
Note that I’m also logging each response from Viber to Couchbase. This could be very useful information for later analysis and/or troubleshooting. If Viber decides to change the structure and content of their response, the data in Couchbase is all stored as flexible JSON data. You will not get surprise errors or missing data at this ingestion point.
Summary
That’s all the basics. Check out the source code for the complete set of actions/operations that the chatbot can do. To test out the bot, I used my Viber app for Android on my phone (and my wife’s, to make sure it worked when I went public).
Beware: by the time you read this, the chatbot I created will likely be taken offline. Anyone else who creates a "Couchbase Bot" is not me!
Here’s a recap of the benefits of this approach to creating a chatbot:
-
The serverless approach is a good way to control costs of a chatbot. Whether it’s Viber or some other messaging platform, there is potential for sporadic and cyclic use.
-
Viber’s REST API utilizes JSON, which makes Couchbase a natural fit for tracking/storing/querying.
-
Couchbase’s ease of scaling and partnerships with Microsoft (and Amazon and Google) make it a great choice for a chatbot backend.
This was really fun, and I could definitely get carried away playing with this new chatbot. It could analyze images, tell jokes, look up all kinds of information, sell products and services, or any number of useful operations.
I would love to hear what you’re doing with chatbots! Please leave a comment or contact me on Twitter @mgroves.
This is a repost that originally appeared on the Couchbase Blog: ASP.NET Core with Couchbase: Getting Started.
ASP.NET Core is the newest development platform for Microsoft developers. If you are looking for information about plain old ASP.NET, check out ASP.NET with Couchbase: Getting Started.
ASP.NET Core Tools to Get Started
The following video will take you from having no code to having an HTTP REST API that uses Couchbase Server, built with ASP.NET Core.
These tools are used in the video:
-
Couchbase Server 5.0 Community Edition (Enterprise Edition will also work)
-
ASP.NET Core 2.0
-
Swagger (provided by Swashbuckle.AspNetCore)
Getting Started Video
In the video, I touch quickly on Scan Consistency. For more details on that, check out the Scan Consistency documentation or read a blog post that I wrote introducing AtPlus, which also covers the other types of Scan Consistency.
Summary
This video gives you the absolute minimum to get started with Couchbase by walking you through a simple CRUD application.
If you have any questions, please leave a comment. Or, you can always ask me questions on Twitter @mgroves.
This is a repost that originally appeared on the Couchbase Blog: ASP.NET with Couchbase: Getting Started.
ASP.NET is the development platform that most Microsoft developers use. At the Couchbase Connect Silicon Valley 2017 conference, I spoke to some .NET developers in a workshop. I asked them what type of content they’d like to see me create that would be most useful for them. The answer was: videos on getting started.
ASP.NET Tools to Get Started
The below video takes you from having no code to having an HTTP-based REST API that uses Couchbase Server, built with ASP.NET.
The video uses the following tools:
-
Couchbase Server 5.0 Community Edition (Enterprise Edition will also work just fine)
-
ASP.NET (not ASP.NET Core, that’s coming in a later video)
-
Swagger (provided by Swashbuckle)
Getting Started Video
In the video, I briefly gloss over Scan Consistency. For more details on that, check out the Scan Consistency documentation or read a blog post that I wrote introducing AtPlus, which also covers the other types of Scan Consistency.
Summary
This video gives you the absolute minimum to get started with Couchbase by walking you through a simple CRUD application. Stay tuned for a similar video on getting started with ASP.NET Core.
If you have any questions, please leave a comment. Or, you can always ask me questions on Twitter @mgroves.
