How I use Fluent Migrator
Managing database migrations is an important part of a project. Everyone on the team needs to be on the same page when it comes to the database, while still having the ability to make database changes when necessary.
I've used a variety of tools to do this on various projects, but one tool that I especially like is Fluent Migrator.
The idea with Fluent Migrator is to create a series of classes that create and modify the database schema (and data). Each class represents a single "migration" (in the sense that you are "migrating" from an empty database to a database with something in it). Here's an example of a migration that I might create if I were creating a table to store user information:
Several things to note:
Fluent syntax. This just means that you can chain stuff together in a natural and fluent way (see NDecision, Fluent NHibernate, Fluent Validation, etc for other examples). This was kinda a "trend" for a while in C# projects, but it does make sense in a number of contexts. The goal is to make the API discoverable and easy to use and also to make the code easier to read. Note that there are some sensible defaults when you create columns, but it never hurts to be explicit.
Migration attribute and Migration base class. This attribute and base class needs to be on each migration class. The number in the attribute determines the order in which the migrations will be executed (we only have 1 so far, but the next one would be 2, for instance).
Up and Down. Override the "Up" method to put in the code that will create/alter the database. Override the "Down" method to put in the code that will revert the changes made in the "Up" method. In some cases, it may not make sense to create a "Down".
Okay, let's say I create that migration, execute it (more on how to execute it later) against a database, write some code that uses that table, and check everything in. The next day, I learn that I need to create an optional "url" field for users. To do that, I'll create another migration class (I'm not editing the existing migration).
These migrations get compiled into a plain DLL, so to actually execute them against a database, you'll need some sort of migration runner. I've been using the command line runner, but there are runners for NAnt, MSBuild, and Rake available too if you use any of those tools on your build server to automatically deploy the database migrations alongside your application.
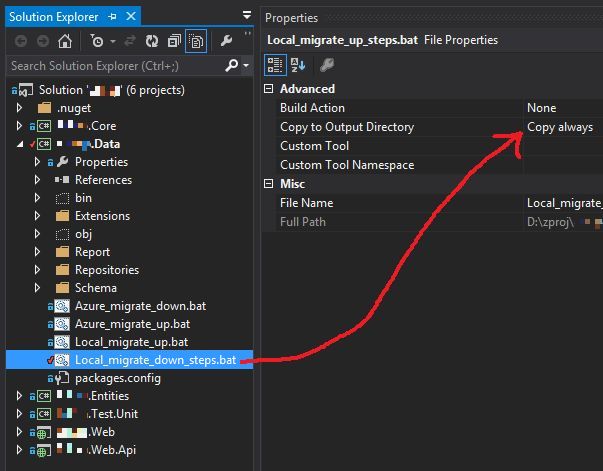
My next step usually involves creating some convenience batch files to use the command line migration runner. You can use these locally while you develop, or possibly call them as part of your build process. Here's an example of a set of batch files that I use to "Up" my local database to run all the latest migrations and one to "Down" my migration back a number of steps (both of these operations are very common while developing).
I put these in the project, but I always have them deploy to the bin folder (where the compiled migrations are). You could do it vice versa if you want.

So that's it. Works against SQL 2012 and SQL Azure, in case you were wondering.
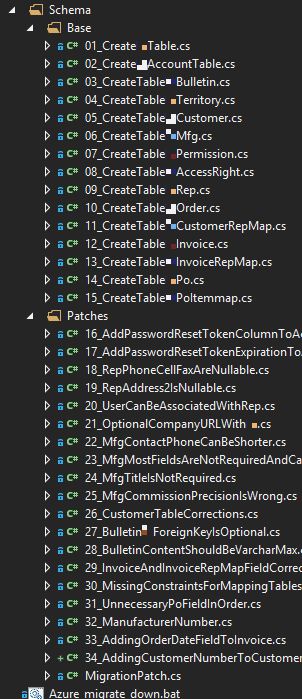
One other thing I do for the sake of organization is that I name all my migration files like NN_MigrationName. When I look at the list of files, I'll see them in migration order. Here's a screenshot from a real project of mine:

